Các đoạn mã JavaScript hay (1 người xem)

Liên hệ QC

Người dùng đang xem chủ đề này

JavaScriptBank.com

Thành viên mới
Tham gia
27/4/09
Bài viết
33
Được thích
7
Thư viện JavaScript

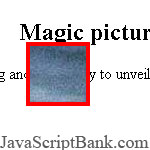
Xem ảnh qua kính

Hiệu ứng làm cho ảnh bạn cần xem ẩn bên dưới lớp nền của trang web. Bạn chỉ có thể xem qua ảnh này bằng cách giữ và kéo rê ô vuông đến những nơi cần ... chi tiết


Cách cài đặt

Bước 1: Copy mã CSS bên dưới và dán vào khu vực HEAD trên trang web của bạn
CSS
Mã:
<STYLE type=text/css>A {
	COLOR: #000000
}
A:visited {
	COLOR: #000000
}
A:active {
	COLOR: #000000
}
A:hover {
	COLOR: #ff0000
}
.baselinestyle {
	FONT-FAMILY: Verdana; FONT-SIZE: 8pt; LEFT: 10px; POSITION: absolute; TOP: 200px; WIDTH: 240pt
}
</STYLE>
	<!--
    	This script downloaded from www.JavaScriptBank.com
    	Come to view and download over 2000+ free javascript at www.JavaScriptBank.com
	-->

Bước 2: Copy mã JavaScript bên dưới và dán vào khu vực HEAD trên trang web của bạn
JavaScript
Mã:
<SCRIPT language=JavaScript>
// Magic picture effect script

var isNav, isIE
var offsetX, offsetY
var selectedObj 

var dragimg_width=64
var dragimg_height=64

var dragimg_startx=410
var dragimg_starty=80

var clipLeft=dragimg_startx
var clipTop=dragimg_starty

var clipRight=clipLeft+dragimg_width
var clipBottom=clipTop+dragimg_height

if (parseInt(navigator.appVersion) >= 4) {
	if (navigator.appName == "Netscape") {
		isNav = true
	} else {
		isIE = true
	}
}

function setZIndex(obj, zOrder) {
	obj.zIndex = zOrder
}


function shiftTo(obj, x, y) {
	if (isNav) {
		obj.moveTo(x,y)
		document.bgimage.clip.top=y
		document.bgimage.clip.left=x
		document.bgimage.clip.bottom=y+dragimg_height
		document.bgimage.clip.right=x+dragimg_width	
	
	}
	else {
		clipTop=y
		clipLeft=x
		clipBottom=y+dragimg_height
		clipRight=x+dragimg_width
		document.all.bgimage.style.clip="rect("+clipTop+" "+clipRight+" "+clipBottom+" "+clipLeft+")"
		obj.pixelLeft = x
		obj.pixelTop = y
	}
}

function setSelectedElem(evt) {
	if (isNav) {
		var testObj
		var clickX = evt.pageX
		var clickY = evt.pageY
		for (var i = document.layers.length - 1; i >= 0; i--) {
			testObj = document.layers[i]
			if ((clickX > testObj.left) && 
				(clickX < testObj.left + testObj.clip.width) && 
				(clickY > testObj.top) && 
				(clickY < testObj.top + testObj.clip.height) && (testObj.name=="picture1")) {
					selectedObj = testObj
					setZIndex(selectedObj, 100)
					return
			}
		}
	} else {
		var imgObj = window.event.srcElement
		if (imgObj.parentElement.id.indexOf("picture") != -1) {
			selectedObj = imgObj.parentElement.style
			setZIndex(selectedObj,100)
			return
		}
	}
	selectedObj = null
	return
}

function dragIt(evt) {
	if (selectedObj) {
		if (isNav) {
			shiftTo(selectedObj, (evt.pageX - offsetX), (evt.pageY - offsetY))
		} else {
			shiftTo(selectedObj, (window.event.clientX - offsetX), (window.event.clientY - offsetY))
			return false
		}
	}
}

function engage(evt) {
	setSelectedElem(evt)
	if (selectedObj) {
		if (isNav) {
			offsetX = evt.pageX - selectedObj.left
			offsetY = evt.pageY - selectedObj.top
		} else {
			offsetX = window.event.offsetX
			offsetY = window.event.offsetY
		}
	}
	return false
}

function release(evt) {
	if (selectedObj) {
		setZIndex(selectedObj, 0)
		selectedObj = null
	}
}

function setNavEventCapture() {
	if (isNav) {
		document.captureEvents(Event.MOUSEDOWN | Event.MOUSEMOVE | Event.MOUSEUP)
	}
}

function init() {
	if (isNav) {
		setNavEventCapture()
	}
	document.onmousedown = engage
	document.onmousemove = dragIt
	document.onmouseup = release
	if (document.all) {
		clipTop=dragimg_starty
		clipLeft=dragimg_startx
		clipBottom=clipTop+dragimg_height
		clipRight=clipLeft+dragimg_width
		document.all.picture1.style.posLeft=dragimg_startx
		document.all.picture1.style.posTop=dragimg_starty
		document.all.bgimage.style.posLeft=0
		document.all.bgimage.style.posTop=0
		document.all.bgimage.style.clip="rect("+clipTop+" "+clipRight+" "+clipBottom+" "+clipLeft+")"
	}
	
	if (document.layers) {
		document.bgimage.clip.left=dragimg_startx
		document.bgimage.clip.right=clipLeft+dragimg_width
		document.bgimage.clip.top=dragimg_starty
		document.bgimage.clip.bottom=clipTop+dragimg_height
		document.picture1.left=dragimg_startx
		document.picture1.top=dragimg_starty
		document.bgimage.left=0
		document.bgimage.top=0
	}
}
// - End of JavaScript - -->
</SCRIPT>
	<!--
    	This script downloaded from www.JavaScriptBank.com
    	Come to view and download over 2000+ free javascript at www.JavaScriptBank.com
	-->

Bước 3: Copy mã HTML bên dưới và dán vào khu vực BODY trên trang web của bạn
HTML
Mã:
<BODY onload=init()>
<DIV id=bgimage style="LEFT: 0px; POSITION: absolute; TOP: -3000px">
  <IMG 
name=bgimagpic src="pic191.jpg" width="600" height="414"></DIV>

<DIV id=picture1 style="LEFT: 0px; POSITION: absolute; TOP: -3000px; wdith: 100%;">
  <IMG 
name=picturePic1 src="dragpic271.gif" width="64" height="64"></DIV>
<DIV class=baselinestyle id=redirtext><b>Drag the image to experience the new magic unveiling effect.</b></DIV>
</BODY>
	<!--
    	This script downloaded from www.JavaScriptBank.com
    	Come to view and download over 2000+ free javascript at www.JavaScriptBank.com
	-->

Bước 4: Tải các file bên dưới về
Files
dragpic271.gif


Bạn có thể xem thêm nhiều JavaScript khác về Hình ảnhXem ảnh


Mã nguồn JavaScript - Mã hóa HTML-JS-CSS - Danh ngôn cho website
Thông tin Bản quyền đã viết:
BẢN THỎA THUẬN
JavaScriptBank.com và NGƯỜI SỬ DỤNG
MÃ NGUỒN JAVASCRIPT TRÊN JavaScriptBank.com

- JavaScriptBank.com chỉ nhằm tập hợp tất cả mã nguồn JavaScript lại để cho bạn tiện tham khảo. Và hầu hết mã nguồn đều được JavaScriptBank.com biên soạn và chỉnh sửa cho phù hợp nhu cầu người sử dụng.

- Khi sử dụng mã nguồn JavaScript từ JavaScriptBank.com, bạn phải bắt buộc chấp nhận những điều khoản và qui định riêng của tác giả (hoặc nơi xuất xứ của đoạn JavaScript) được ghi bên trong mã nguồn. JavaScriptBank.com sẽ không chịu trách nhiệm pháp lý đối với các hành vi vi phạm (nếu có) quyền sở hữu trí tuệ của chính tác giả đoạn JavaScript mà bạn sử dụng.

- Bạn không thể (và không được phép) gỡ bỏ các chú thích mang tính chất bản quyền ở bên trong mỗi đoạn JavaScript mà bạn sử dụng.

- Nội dung trong khu vực JavaScript thuộc bản quyền riêng của JavaScriptBank.com, và bạn không được phép xuất bản, đăng hay gửi lại trên bất kì phương tiện truyền thông, website nào khác mà chưa được sự đồng ý của JavaScriptBank.com.

- Một liên kết trở lại JavaScriptBank.com đối với những JavaScript bạn sử dụng từ website này thì được đề nghị và rất được hoan nghênh(mặc dù không bắt buộc).
 
Cửa sổ 'rơi đài'

Hiệu ứng tạo một cửa sổ rơi từ trên xuống trung tâm trình duyệt rồi sau đó nhúc nhích trong m... chi tiết


Cách cài đặt

Bước 1: Đặt mã JavaScript bên dưới vào phần HEAD
JavaScript
Mã:
<SCRIPT>
function drop(n) {
if(self.moveBy){
self.moveBy (0,-900);
for(i = n; i > 0; i--){
self.moveBy(0,3);
}
for(j = 8; j > 0; j--){
self.moveBy(0,j);
self.moveBy(j,0);
self.moveBy(0,-j);
self.moveBy(-j,0);
}
}
}
</SCRIPT>
	<!--
    	This script downloaded from www.JavaScriptBank.com
    	Come to view and download over 2000+ free javascript at www.JavaScriptBank.com
	-->

Bước 2: Copy mã HTML bên dưới và dán vào khu vực BODY trên trang web của bạn
HTML
Mã:
<BODY onload=drop(300)>
</BODY>
	<!--
    	This script downloaded from www.JavaScriptBank.com
    	Come to view and download over 2000+ free javascript at www.JavaScriptBank.com
	-->


Bạn có thể xem thêm nhiều JavaScript khác về Trình duyệtCửa sổ


Menu 3D xoay theo chuột

Hiệu ứng tạo một trình đơn với các tùy chọn có thể di chuyển với góc nhìn ba chiều tùy theo tốc độ... chi tiết


Cách cài đặt

Bước 1: Mã CSS bên dưới dùng cho định dạng hiệu ứng, hãy copy nó vào phần HEAD của web
CSS
Mã:
<STYLE type=text/css>BODY {
	FONT-SIZE: 10px; COLOR: black; FONT-FAMILY: Georgia,Trebuchet MS, Verdana, Arial, Helvetica, sans-serif; LETTER-SPACING: 2px; BACKGROUND-COLOR: #fafafa
}
A:link {
	COLOR: #9e0b0e; TEXT-DECORATION: none
}
A:visited {
	COLOR: #9e0b0e; TEXT-DECORATION: none
}
A:active {
	COLOR: #9e0b0e; TEXT-DECORATION: none
}
A:hover {
	COLOR: #de8800; TEXT-DECORATION: none
}
</STYLE>
	<!--
    	This script downloaded from www.JavaScriptBank.com
    	Come to view and download over 2000+ free javascript at www.JavaScriptBank.com
	-->

Bước 2: Copy mã JavaScript bên dưới và dán vào khu vực HEAD trên trang web của bạn
JavaScript
Mã:
<SCRIPT language=javascript>
<!-- // (c) 2001 Till Nagel, till@netzministerium.de & Rene Sander, rene@netzministerium.de

// ---------------------------------------------------------------------------

// creates cube model with ColorRectMaterial blending from white to black
var cubeModel;

// create model and assign first (default) material
cubeModel = new Model("cube", new Material('<a href="http://www.lycos.com" target="_blank" onfocus="blur()">Lycos</a>') );
cubeModel.materials[1] = new Material('<a href="http://www.search.com" target="_blank" onfocus="blur()">Search</a>');
cubeModel.materials[2] = new Material('<a href="http://www.yahoo.com" target="_blank" onfocus="blur()">Yahoo</a>');
cubeModel.materials[3] = new Material('<a href="http://www.fireball.com" target="_blank" onfocus="blur()">Fireball</a>');
cubeModel.materials[4] = new Material('<span style="font-size:20px;"><a href="http://www.google.com" target="_blank" onfocus="blur()">Google</a></span>');
cubeModel.materials[5] = new Material('<a href="http://www.altavista.com" target="_blank" onfocus="blur()">Altavista</a>');
cubeModel.materials[6] = new Material('<a href="http://www.hotbot.com" target="_blank" onfocus="blur()">Hotbot</a>');
cubeModel.materials[7] = new Material('<a href="http://www.webcrawler.com" target="_blank" onfocus="blur()">Webcrawler</a>');

// defines model points.
// The model's points have to be defined before the respective code is written into the document.
cubeModel.setPoints(createCubeModelPoints());


// ---------------------------------------------------------------------------

// modulator to rotate the model dependent on mouse interactions
var myMouseModulator = new MouseModulator("myMouseModulator", 0);


// ---------------------------------------------------------------------------

function initOnLoad() {
	fixNetscape();

	cubeModel.assignLayers();
	
	// creates and inits matrix to initialize the model
	var initMatrix = new Matrix();
	initMatrix.scale(50, 50, 50);
	
	// >> begin to work with the model etc.

	// initializes model
	cubeModel.transform(initMatrix);
	
	// >> first draw of the model (recommended)
	 cubeModel.draw();
	
	// starts animation
	animate();
}

/*
 * The main animate method. Calls itself repeatedly.
 */
function animate() {
	var delay = 10;
	
	// animates cube model ----------------------------------------

	// animates the modulator to spin the cube
	myMouseModulator.animate();
	// transforms the cube depending on mouse movements.
	cubeModel.transform(myMouseModulator.getMatrix());
	
	// updates display
	cubeModel.draw();
	
	// calls itself with an delay to decouple client computer speed from the animation speed.
	// result: the animation is as fast as possible.
	setTimeout("animate()", delay);
}


// event handling
document.onmousemove = mouseMoveHandler;
document.onmousedown = mouseDownHandler;
document.onmouseup = mouseUpHandler;
if (ns || ns6) document.captureEvents(Event.MOUSEMOVE | Event.MOUSEDOWN | Event.MOUSEUP);

/*
 * The mouse handlers in this document must call the modulator's handlers.
 * To be able to use a mouse modulator and to do your own stuff.
 */
function mouseMoveHandler(e) {
	// calls move handler of the mouse modulator
	myMouseModulator.move(e);
	return !ie;
}

function mouseDownHandler(e) {
	// calls down handler of the mouse modulator
	myMouseModulator.down(e);
}

function mouseUpHandler(e) {
	// calls up handler of the mouse modulator
	myMouseModulator.up(e);
}


// ---------------------------------------------------------------------------

function createCubeModelPoints() {
	// the cube model
	return new Array(
		new Point3D(   0,    5,  0, 0),
		new Point3D( 3.5,  3.5,  0, 1),
		new Point3D(   5,    0,  0, 2),
		new Point3D( 3.5, -3.5,  0, 3),
		new Point3D(   0,   -5,  0, 4),
		new Point3D(-3.5, -3.5,  0, 5),
		new Point3D(  -5,    0,  0, 6),
		new Point3D(-3.5,  3.5,  0, 7)
	);
}


// -->
</SCRIPT>
	<!--
    	This script downloaded from www.JavaScriptBank.com
    	Come to view and download over 2000+ free javascript at www.JavaScriptBank.com
	-->

Bước 3: Đặt mã HTML bên dưới vào phần BODY
HTML
Mã:
<BODY onload=initOnLoad()>
<!-- layer to bugfix netscape -->
<DIV id=fixnetscape style="VISIBILITY: hidden; POSITION: absolute"></DIV>
<SCRIPT language=JavaScript type=text/javascript>
	<!-- // (c) 2001 Till Nagel, till@netzministerium.de & Rene Sander, rene@netzministerium.de
	
	/* MANDATORY: INSERTION OF HTML PART INTO PAGE
	   creates the HTML code representing the model's points
	   NB: This is written directly into the page from within the method */
	
	cubeModel.createPointCode();
	// -->
	</SCRIPT>
</body>
	<!--
    	This script downloaded from www.JavaScriptBank.com
    	Come to view and download over 2000+ free javascript at www.JavaScriptBank.com
	-->

Bước 4: các file cần tải
Files
LyrObj.js
ColorUtil.js
MouseModulator.js
3dhtml.js
materials.js


Các hiệu ứng tương tự
- Trái tim xoay theo chuột 2
- Thái Dương hệ xoay theo chuột
- Khối lập phương xoay theo chuột
Bạn có thể xem thêm nhiều JavaScript khác về 3D


Hiển thị thời gian

Một đoạn mã JavaScript khác để tạo hiệu ứng hiển thị thời gian trên trang web bằng cách đơn giản.... chi tiết


Cách cài đặt

Bước 1: Dùng mã JavaScript để cài đặt hiệu ứng
JavaScript
Mã:
<script language="javascript">
var ns4=(document.layers)?true:false;
var ie4=(document.all && !document.getElementById)?true:false;
var now=new Date();
now.hrs='00';
now.min='00';
now.sec='00';
var dclk;

function setclock(){
now=new Date(); now.hrs=now.getHours(); now.min=now.getMinutes(); now.sec=now.getSeconds();
now.hrs=((now.hrs>12)? now.hrs-12 : now.hrs)+"";
now.hrs=((now.hrs<10)? "0" : "")+now.hrs;
now.min=((now.min<10)? "0" : "")+now.min;
now.sec=((now.sec<10)? "0" : "")+now.sec;
if(ns4){
dclk.document.open();
dclk.document.write('<div style="position:absolute; left:0px; top:0px; font-size:80px; color:white;"><center>'+now.hrs+':'+now.min+':'+now.sec+'</center></div>');
dclk.document.close();
}else dclk.innerHTML=now.hrs+':'+now.min+':'+now.sec;
}

window.onload=function(){
  setInterval('setclock()',300);
  dclk=(ns4)?document.layers['dclk']:(ie4)?document.all['dclk']:document.getElementById('dclk');
}

window.onresize=function(){
  if(ns4)setTimeout('history.go(0)',400);
}
</script>
	<!--
    	This script downloaded from www.JavaScriptBank.com
    	Come to view and download over 2000+ free javascript at www.JavaScriptBank.com
	-->

Bước 2: Đặt mã HTML bên dưới vào phần BODY
HTML
Mã:
<table border="0" width="300" height="35"><tr><td align="center">
<div id="dclk" style="position:relative; font-size:80px; color:#00436e;"></div>
</td></tr></table>
	<!--
    	This script downloaded from www.JavaScriptBank.com
    	Come to view and download over 2000+ free javascript at www.JavaScriptBank.com
	-->


Hiệu ứng cùng chức năng
- Hiển thị múi giờ giữa khách và chủ
- Hiển thị địa chỉ của trang
- Thời gian các nơi (so với Nhật)
Bạn có thể xem thêm nhiều JavaScript khác về Thời gianĐồng hồ


Khung textarea di chuyển

Hiệu ứng xem từng chữ của đoạn [URL="http://www.javascriptbank.com/javascript/text/"]văn bản[/URL] qua sự di chuyển"]<a h... chi tiết


Cách cài đặt

Bước 1: Đặt mã JavaScript bên dưới vào phần HEAD
JavaScript
Mã:
<SCRIPT language=JavaScript>
// Automatic textreader for your lazy visitors

// CONFIGURATION: 
// Copy the script block and paste it in the head-zone of your HTML-file (textreader.html)
// Copy the three div-blocks (named "bgdiv", "frontdiv", "framepic") and paste them
// just above the </body> the tag. Do not change their order!
// Write into the div-blocks "bgdiv" and "frontdiv" the same text.
// Copy the image "framepic42.gif" anf put it in the same directory 
// as the file "textreader.html".

// Speed of the textreader
var tempo=30

// Width and height of the transparent image "framepic42.gif" (pixels)
var framepic_width=150
var framepic_height=80

// the vertical jump of the image after finishing one row (pixels)
var ystep=20

var framepic_startx=0
var framepic_starty=0

var marginbottom 
var marginright 

var clipLeft=framepic_startx
var clipTop=framepic_starty
var clipRight=clipLeft+framepic_width
var clipBottom=clipTop+framepic_height

var xstep=10

function moveframe() {
	if (document.layers) {
		if (document.framepic.left<marginright-framepic_width) {
			document.framepic.left+=xstep
			document.frontdiv.clip.left=document.framepic.left
			document.frontdiv.clip.right=document.framepic.left+framepic_width		
		}
		else {
			document.framepic.left=0
			if (document.framepic.top<marginbottom-framepic_height) {
				document.framepic.top+=ystep
				document.frontdiv.clip.top=document.framepic.top
				document.frontdiv.clip.bottom=document.frontdiv.clip.top+framepic_height
			}
			else {
				document.framepic.top=0
				document.frontdiv.clip.top=document.framepic.top
				document.frontdiv.clip.bottom=document.frontdiv.clip.top+framepic_height
			}
		}
	}
	if (document.all) {
		if (document.all.framepic.style.posLeft<marginright-framepic_width) {
			document.all.framepic.style.posLeft+=xstep
			clipLeft=document.all.framepic.style.posLeft
			clipRight=clipLeft+framepic_width
			document.all.frontdiv.style.clip="rect("+clipTop+" "+clipRight+" "+clipBottom+" "+clipLeft+")"
		}
		else {
			document.all.framepic.style.posLeft=0
			if (document.all.framepic.style.posTop<marginbottom-framepic_height) {
				document.all.framepic.style.posTop+=ystep
				clipTop=document.all.framepic.style.posTop
				clipBottom=clipTop+framepic_height
			}
			else {
				document.all.framepic.style.posTop=0
				clipTop=document.all.framepic.style.posTop
				clipBottom=clipTop+framepic_height
			}
		}
	}
}

function init() {
	if (document.all) {
		marginbottom = document.body.clientHeight
		marginright = document.body.clientWidth
		clipTop=framepic_starty
		clipLeft=framepic_startx
		clipBottom=clipTop+framepic_height
		clipRight=clipLeft+framepic_width
		document.all.frontdiv.style.clip="rect("+clipTop+" "+clipRight+" "+clipBottom+" "+clipLeft+")"
		document.all.frontdiv.style.visibility="VISIBLE"
	}
	if (document.layers) {
		marginbottom = window.innerHeight
		marginright = window.innerWidth
		document.frontdiv.clip.left=framepic_startx
		document.frontdiv.clip.right=clipLeft+framepic_width
		document.frontdiv.clip.top=framepic_starty
		document.frontdiv.clip.bottom=clipTop+framepic_height
		document.frontdiv.visibility="visible"
	}
	var timer=setInterval("moveframe()",tempo)
}
// - End of JavaScript - -->
</SCRIPT>
	<!--
    	This script downloaded from www.JavaScriptBank.com
    	Come to view and download over 2000+ free javascript at www.JavaScriptBank.com
	-->

Bước 2: Copy mã HTML bên dưới và dán vào khu vực BODY trên trang web của bạn
HTML
Mã:
<BODY onload=init()>
<DIV id=bgdiv 
style="COLOR: #eeeeee; FONT-FAMILY: Verdana; FONT-SIZE: 20pt; LEFT: 0px; POSITION: absolute; TOP: 0px">
	The first fully automatic text-reader for your lazy visitors. Watch it and 
	be happy. The first fully automatic text-reader for your lazy visitors. 
	Watch it and be happy. The first fully automatic text-reader for your lazy 
	visitors. Watch it and be happy. The first fully automatic text-reader for 
	your lazy visitors. Watch it and be happy. The first fully automatic 
	text-reader for your lazy visitors. Watch it and be happy. The first fully 
	automatic text-reader for your lazy visitors. Watch it and be happy. The 
	first fully automatic text-reader for your lazy visitors. Watch it and be 
	happy. The first fully automatic text-reader for your lazy visitors. Watch 
	it and be happy. The first fully automatic text-reader for your lazy 
	visitors. Watch it and be happy. The first fully automatic text-reader for 
	your lazy visitors. Watch it and be happy. </DIV>
<DIV id=frontdiv 
style="COLOR: #000000; FONT-FAMILY: Verdana; FONT-SIZE: 20pt; LEFT: 0px; POSITION: absolute; TOP: 0px">
	The first fully automatic text-reader for your lazy visitors. Watch it and 
	be happy. The first fully automatic text-reader for your lazy visitors. 
	Watch it and be happy. The first fully automatic text-reader for your lazy 
	visitors. Watch it and be happy. The first fully automatic text-reader for 
	your lazy visitors. Watch it and be happy. The first fully automatic 
	text-reader for your lazy visitors. Watch it and be happy. The first fully 
	automatic text-reader for your lazy visitors. Watch it and be happy. The 
	first fully automatic text-reader for your lazy visitors. Watch it and be 
	happy. The first fully automatic text-reader for your lazy visitors. Watch 
	it and be happy. The first fully automatic text-reader for your lazy 
	visitors. Watch it and be happy. The first fully automatic text-reader for 
	your lazy visitors. Watch it and be happy. The first fully automatic 
	text-reader for your lazy visitors. Watch it and be happy. The first fully 
	automatic text-reader for your lazy visitors. Watch it and be happy. The 
	first fully automatic text-reader for your lazy visitors. Watch it and be 
	happy. The first fully automatic text-reader for your lazy visitors. Watch 
	it and be happy. The first fully automatic text-reader for your lazy 
	visitors. Watch it and be happy. The first fully automatic text-reader for 
	your lazy visitors. Watch it and be happy. </DIV>
<DIV id=framepic style="LEFT: 0px; POSITION: absolute; TOP: 0px">
  <IMG src="framepic42.gif" width="150" height="80"></DIV>
</BODY>
	<!--
    	This script downloaded from www.JavaScriptBank.com
    	Come to view and download over 2000+ free javascript at www.JavaScriptBank.com
	-->

Bước 3: các file cần tải
Files
framepic42.gif


Hiệu ứng cùng chức năng
- Luồng ảnh di chuyển
- Menu di chuyển xuống
- Di chuyển đến đầu trang
Bạn có thể xem thêm nhiều JavaScript khác về Chữ


Ô vuông di chuyển

Hiệu ứng tạo một ô vuông di chuyển khi ta nhấp chuột vào liên kết.... chi tiết


Cách cài đặt

Bước 1: Copy mã JavaScript bên dưới và dán vào khu vực HEAD trên trang web của bạn
JavaScript
Mã:
<SCRIPT language=JavaScript>
<!--
// Example -
// <a href="#" onmousedown="glide('elDiv',660,10)">glide</a>
// where the arguments are glide(id of layer, the end position of layer animation, number of steps)

function glide(obj,endPos,steps) {
// changing this number will vary the amount of gliding
var decrease = 0.05; 
if (document.getElementById) {
el = document.getElementById(obj).style ;
}
else if (document.all){
el = document.all[obj].style; 
}
else if (document.layers) { 
el = document.layers[obj];
}
// you can change references to left in the script to top and that will give a vertical animation 
el.xpos = parseInt(el.left);
	if (el.xpos < endPos) {
	distance = endPos - el.xpos;
	steps = distance*decrease; 
// to shove a layer off screen change to
// el.xpos -= steps;
	el.xpos += steps;
	el.left = el.xpos;
// change the 30 value to increase or decrease speed, higher the numeric value the slower the speed
	setTimeout("glide('" + obj + "'," + endPos + "," + steps + ")",30);
  }
 }
function glide_from_jsbank()
{
	var x = Math.ceil(Math.random()*500),
		y = Math.ceil(Math.random()*500);
	glide('elDiv', x, y);
}
//-->
</SCRIPT>
	<!--
    	This script downloaded from www.JavaScriptBank.com
    	Come to view and download over 2000+ free javascript at www.JavaScriptBank.com
	-->

Bước 2: Copy mã HTML bên dưới và dán vào khu vực BODY trên trang web của bạn
HTML
Mã:
	<A onclick="glide_from_jsbank();" 
href="#">glide</A> 


<DIV id=elDiv 
style="LEFT: 50px; WIDTH: 30px; CLIP: rect(0px 30px 30px 0px); POSITION: absolute; TOP: 100px; HEIGHT: 30px; BACKGROUND-COLOR: red; layer-background-color: red"></DIV>
	<!--
    	This script downloaded from www.JavaScriptBank.com
    	Come to view and download over 2000+ free javascript at www.JavaScriptBank.com
	-->


Hiệu ứng cùng chức năng
- Luồng ảnh di chuyển
- Menu di chuyển xuống
- Di chuyển đến đầu trang
Bạn có thể xem thêm nhiều JavaScript khác về Linh tinh


Menu xổ dọc tự động

Hiệu ứng tạo một hộp thoại hiển thị nội dung khi ta chọn.... chi tiết


Cách cài đặt

Bước 1: Đặt mã JavaScript bên dưới vào phần HEAD
JavaScript
Mã:
<SCRIPT language=javascript>

function SelVal(fF,tF,fname,tname)

<!-- Another small but powerful function by Ira -->
<!-- Original Programmed by Ira Sterbakov - irasterb@erols.com 8/20/04 -->
<!-- May be freely used and modified - email notification would be nice -->

	{
	eval(tF + "." + fname + ".value = " + fF + "." + tname + ".options.value");
	}

</SCRIPT>
	<!--
    	This script downloaded from www.JavaScriptBank.com
    	Come to view and download over 2000+ free javascript at www.JavaScriptBank.com
	-->

Bước 2: Copy mã HTML bên dưới và dán vào khu vực BODY trên trang web của bạn
HTML
Mã:
<FORM name=mess1>
<TABLE cellPadding=4 border=0>
  <TBODY>
  <TR>
    <TD>
      <P><B>First</B></P></TD>
    <TD>
      <P><B><SELECT style="WIDTH: 140px" 
      onchange="SelVal('mess1','mess2','sf1','us1')" name=us1> <OPTION 
        value="" selected>- None selected -<OPTION value=F1>First Op<OPTION 
        value=F2>Second Op</OPTION></SELECT></B></P></TD></TR></TBODY></TABLE></FORM>

<FORM name=mess2>
<TABLE cellPadding=4 border=0>
  <TBODY>
  <TR>
    <TD>
      <P><B>Second</B></P></TD>
    <TD>
      <P><INPUT size=40 name=sf1></P></TD></TR></TBODY></TABLE></FORM>
	<!--
    	This script downloaded from www.JavaScriptBank.com
    	Come to view and download over 2000+ free javascript at www.JavaScriptBank.com
	-->


Bạn có thể xem các mã tương tự bên dưới
- Menu xổ dọc đầy tiện lợi
- Menu xổ dọc được tùy biến 2
- Menu xổ dọc được tùy biến
Bạn có thể xem thêm nhiều JavaScript khác về Biểu mẫuTrình đơn xổ dọc


Ngày đơn giản

Đoạn mã sẽ hiển thị ngày, tháng và năm hiện tại trên trang web (với điều kiện ngày, tháng trong máy tính đúng với <a... chi tiết


Cách cài đặt

Bước 1: Copy mã JavaScript bên dưới và dán vào khu vực HEAD trên trang web của bạn
JavaScript
Mã:
<script language="javascript">

// Created by: Lee Underwood :: http://javascript.internet.com/

function displayDate() {
  var now = new Date();
  var today = now.getDate();
  var month = now.getMonth();
    var monthName = new Array(12)
      monthName[0]="January ";
      monthName[1]="February ";
      monthName[2]="March ";
      monthName[3]="April ";
      monthName[4]="May ";
      monthName[5]="June ";
      monthName[6]="July ";
      monthName[7]="August ";
      monthName[8]="September ";
      monthName[9]="October ";
      monthName[10]="November ";
      monthName[11]="December ";
  var year = now.getFullYear();

  document.write(monthName[month]+today+ ", "+year);
}
</script>
	<!--
    	This script downloaded from www.JavaScriptBank.com
    	Come to view and download over 2000+ free javascript at www.JavaScriptBank.com
	-->

Bước 2: Copy mã HTML bên dưới và dán vào khu vực BODY trên trang web của bạn
HTML
Mã:
<script type="text/javascript">
<!--
  displayDate();
//-->
</script>
	<!--
    	This script downloaded from www.JavaScriptBank.com
    	Come to view and download over 2000+ free javascript at www.JavaScriptBank.com
	-->


Các hiệu ứng tương tự
- Ước lượng thời giản tải một tập tin
- Trình đơn xếp gập
- Trình đơn định hướng nhiều cấp
Bạn có thể xem thêm nhiều JavaScript khác về Thời gianĐồng hồ


Chữ có màu nền loang

Hiệu ứng tạo một [URL="http://www.javascriptbank.com/javascript/text/"]dòng chữ[/URL] có [URL="http://www.javascriptbank.com/javascript/background/"][URL="http://www.javascriptbank.com/javascript/backgr... [URL="http://www.javascriptbank.com/glowing-text-ii-script.html/vi//"]chi tiết


Cách cài đặt

Bước 1: Đặt mã CSS bên dưới vào phần HEAD
CSS
Mã:
<style type="text/css">
		<!--

		#glowText {width:500px; height:100px; font-size:36px; filter:glow(strength=5)}
		
		-->
	</style>
	<!--
    	This script downloaded from www.JavaScriptBank.com
    	Come to view and download over 2000+ free javascript at www.JavaScriptBank.com
	-->

Bước 2: Copy mã JavaScript bên dưới và dán vào khu vực HEAD trên trang web của bạn
JavaScript
Mã:
<script language="Javascript" type="text/javascript">
		<!-- Hide script from older browsers
	
		function doGlow(newStrength) {
		    if (document.all && newStrength < 255) {
				newStrength += 10
		    	document.all.glowText.style.filter="glow(strength=" + newStrength+ ")"
		    	setTimeout("doGlow(" + newStrength+ ")", 100)
		    }
		}
	
		// End hiding script -->
	</script>
	<!--
    	This script downloaded from www.JavaScriptBank.com
    	Come to view and download over 2000+ free javascript at www.JavaScriptBank.com
	-->

Bước 3: Copy mã HTML bên dưới và dán vào khu vực BODY trên trang web của bạn
HTML
Mã:
<body onload="doGlow(5)">
<div id="glowText" align="center">JavaScriptBank.com - Bank of over 2000+ free JavaScripts </div>
</body>
	<!--
    	This script downloaded from www.JavaScriptBank.com
    	Come to view and download over 2000+ free javascript at www.JavaScriptBank.com
	-->


Các hiệu ứng tương tự
- Kĩ thuật làm mờ màu nền
- Đổi màu nền cho các đối tượng
- Nút đổi màu nền
Bạn có thể xem thêm nhiều JavaScript khác về ChữMờ và chớp sáng


Các đối tượng xuất hiện ngẫu nhiên

Hiệu ứng tạo ra các liên kết, hình ảnh... xuất hiện ngẫu nhiên trên trang web mỗi khi được tải.... chi tiết


Cách cài đặt

Bước 1: Đặt mã JavaScript bên dưới vào phần HEAD
JavaScript
Mã:
<script>

//1) Specify content(s) to display and rotate
//   You can specify multiple "sets", each displayed in diff. areas of your page

var content=new Array() //sample set 1
content[0]='<a href="http://JavaScriptBank.com"><img src="../image/logojs.gif" border=0></a>'
content[1]='<a href="http://echip.com.vn"><img src="../image/photo3.jpg" border=0></a>'
content[2]='<a href="http://JavaScriptBank.com"><img src="../image/logojs.gif" border=0></a>'

var diffcontent=new Array() //sample set 2
diffcontent[0]='<a href="http://www.google.com">Google Search Engine</a>'
diffcontent[1]='<a href="http://news.bbc.co.uk">BBC News</a>'
diffcontent[2]='<a href="http://www.msnbc.com">MSNBC News</a>'


function randomorder(targetarray, spacing){

var randomorder=new Array()
var the_one
var z=0
for (i=0;i<targetarray.length;i++)
randomorder[i]=i

while (z<targetarray.length){
the_one=Math.floor(Math.random()*targetarray.length)
if (targetarray[the_one]!="_selected!"){
document.write(targetarray[the_one]+spacing)
targetarray[the_one]="_selected!"
z++
}
}
}

</script>
	<!--
    	This script downloaded from www.JavaScriptBank.com
    	Come to view and download over 2000+ free javascript at www.JavaScriptBank.com
	-->

Bước 2: Copy mã HTML bên dưới và dán vào khu vực BODY trên trang web của bạn
HTML
Mã:
<script>
//2) Call function randomorder(arrayname, space_between_content)
randomorder(content, '<br><br>')
randomorder(diffcontent, '<br>')

</script>
	<!--
    	This script downloaded from www.JavaScriptBank.com
    	Come to view and download over 2000+ free javascript at www.JavaScriptBank.com
	-->


Hiệu ứng cùng chức năng
- Tìm tất cả các đối tượng qua tên lớp
- Kéo thả các đối tượng dùng className
- Quản lí kéo thả các đối tượng
Bạn có thể xem thêm nhiều JavaScript khác về Linh tinh


Tìm thứ Sáu ngày 13

Hiệu ứng sẽ tìm số ngày 13 thứ Sáu trong hai cột thời gian.... chi tiết


Cách cài đặt

Bước 1: Đặt mã JavaScript bên dưới vào phần HEAD
JavaScript
Mã:
<script>
// Find Friday the 13th
// Donnie Brewer , brewsky@cox.net , http://jscript.brewskynet.com/friday
var new_Date=new Date()
//var DOW=new_Date.getDay()+1
var DOM=new_Date.getDate()
//var Month=new_Date.getMonth()+1
var Year=new_Date.getFullYear()
var LongMonth = new Array("January","February","March","April","May","June","July","August","September","October","November","December")
var LongDay = new Array("Sunday","Monday","Tuesday","Wednesday","Thursday","Friday","Saturday")
var setTimer = 5000;

function find13th() {
	var Start = startyear.value
	var End = endyear.value
	var TooMuch = End-Start
	//alert(TooMuch)
	if (confirm("Caution, this may result in an extremely large result, and may take a long time to display those results."))
		if (End < Start)						//if end<start alert user, else
			alert("Sorry, the ending year must be greater than or equal to the beginning year..")
	else {									//allow dates and continue
			var BasicHTML = "<center><u>Results!!</u>"
			for (YearTest=Start;YearTest<=End;YearTest++) {
				if (MonthSelect.value==20) {
					for (MonthTest=0;MonthTest<=11;MonthTest++) {
						var TestDate = new Date(YearTest,MonthTest,13)
						if (TestDate.getDay()==5)
						BasicHTML = BasicHTML+"<br>"+LongMonth[MonthTest]+" "+TestDate.getDate()+", "+YearTest
					}
				}
				else {
					var TestDate = new Date(YearTest,MonthSelect.value,13)
					if (TestDate.getDay()==5)
					BasicHTML = BasicHTML+"<br>"+LongMonth[MonthSelect.value]+" "+TestDate.getDate()+", "+YearTest
				}
			}
			document.all["InternalDiv"].innerHTML = BasicHTML;	
		}
	else {
		alert("Please make the years closer together..")
	}
}
function clearResults() {
	var BasicHTML = "<center>Results will be posted here!!</center>"
	document.all["InternalDiv"].innerHTML = BasicHTML;
}

</script>
	<!--
    	This script downloaded from www.JavaScriptBank.com
    	Come to view and download over 2000+ free javascript at www.JavaScriptBank.com
	-->

Bước 2: Copy mã HTML bên dưới và dán vào khu vực BODY trên trang web của bạn
HTML
Mã:
Enter beginning year:&nbsp; 
<input type="text" size="5" maxlength="4" name="startyear" value="2002">
<br><br>
Enter ending year:&nbsp;
<input type="text" size="5" maxlength="4" name="endyear" value="2002">

<br><br>
You may also select by a particular month:&nbsp;

<select name="MonthSelect" size="1" style="height: 22px; width: 130px;"><option value="20" selected="selected">
None Preferred</option><option value="0">January</option><option value="1">

February</option><option value="2">March</option><option value="3">April</option><option value="4">
May</option><option value="5">June</option><option value="6">July</option><option value="7">
August</option><option value="8">September</option><option value="9">October</option><option value="10">
November</option><option value="11">December</option></select>
<br><br>
<input type="button" value="Find" onmouseup="find13th()">&nbsp;&nbsp;&nbsp;&nbsp;&nbsp;

<input type="button" value="Clear Result List" onmouseup="clearResults()">


<layer id="Layer1"></layer><div id="InternalDiv"></div>
	<!--
    	This script downloaded from www.JavaScriptBank.com
    	Come to view and download over 2000+ free javascript at www.JavaScriptBank.com
	-->


Bạn có thể xem thêm nhiều JavaScript khác về Thời gian


Tạo số ngẫu nhiên

Một đoạn mã JavaScript khác để tạo hiệu ứng hiển thị một dãy các số ngẫu nhiên.... chi tiết


Cách cài đặt

Bước 1: Copy mã JavaScript bên dưới và dán vào khu vực HEAD trên trang web của bạn
JavaScript
Mã:
<SCRIPT LANGUAGE="JavaScript">
<!-- Begin

// 


function numbers() {
var nummenu = document.lotto.numbercount;
var numbercount = nummenu.options[nummenu.selectedIndex].value*1;
var maxnumbers = document.lotto.maxnum.value*1;
if (numbercount > maxnumbers) {
alert("Be sure to select a max lottery number value!");
}
else {
var ok = 1;
r = new Array (numbercount);
for (var i = 1; i <= numbercount; i++) {
r[i] = Math.round(Math.random() * (maxnumbers-1))+1;
}
for (var i = numbercount; i >= 1; i--) {
for (var j = numbercount; j >= 1; j--) {
if ((i != j) && (r[i] == r[j])) ok = 0; 
   }   
}
if (ok) {
var output = "";
for (var k = 1; k <= numbercount; k++) {
output += "Number " + k + " = " + r[k] + "\n";
}
document.lotto.results.value = output;
}     
else numbers();
   }
}
//  End -->
</script>
	<!--
    	This script downloaded from www.JavaScriptBank.com
    	Come to view and download over 2000+ free javascript at www.JavaScriptBank.com
	-->

Bước 2: Đặt mã HTML bên dưới vào phần BODY
HTML
Mã:
<form name="lotto">
<table width=100% border=0>
<tr>
<td align=center>Pick 
<select name="numbercount">
<option value="1">1
<option value="2">2
<option value="3">3
<option value="4">4
<option value="5">5
<option value="6" selected>6
<option value="7">7
<option value="8">8
<option value="9">9
<option value="10">10
</select>  
numbers<br>

from 1 through <input type=text name=maxnum value="49" size=2 maxlength=2><br>
<input type=button value="Pick Numbers" onClick="numbers()">
<p>
<textarea name="results" rows=11 cols=15></textarea>
</td>
</tr>
</table>
</form>
	<!--
    	This script downloaded from www.JavaScriptBank.com
    	Come to view and download over 2000+ free javascript at www.JavaScriptBank.com
	-->


Bạn có thể xem các mã tương tự bên dưới
- Tạo nội dung ngẫu nhiên
- Danh ngôn hiện ngẫu nhiên
- Tổng hai số ngẫu nhiên (nhỏ hơn hoặc bằng 18)
Bạn có thể xem thêm nhiều JavaScript khác về Trò chơi


Sao di chuyển

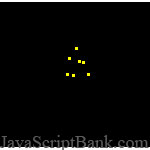
Hiệu ứng tạo một quang cảnh giống như bạn đang di chuyển trong vũ trụ, nó tạo ra các đốm nhỏ như các ngôi s... [URL="http://www.javascriptbank.com/through-the-universe.html/vi//"]chi tiết


Demo: Sao di chuyển | Cách cài đặt[/SIZE]

Bước 1: Dùng mã JavaScript để cài đặt hiệu ứng
JavaScript
Mã:
<SCRIPT language=JavaScript>
<!--
starColors=new Array('#FFFFFF','#99CCFF','#FFFF00','#99CCFF','#FF9999'); //moving stars color array
nStars=27; //number of moving stars
nFarStars=45; //number of background stars
starSpeed=200; //moving star refresh speed
starConst=0.02; //moving star speed
centerSpot=0.4; //dissolv center spot
bgstarscolor='#FFFF00'; //background stars color
//do not edit below this

ns4 = (document.layers)? true:false;
ie4 = (document.all)? true:false;

DynLayerTest.count=0;
DynLayerInit.nestRefArray=new Array();
DynLayerInit.refArray=new Array();
DynLayerInit.refArray.i=0;
DynLayerInit.set=false;

function DynLayer(id,nestref,frame)
 {
  if (!DynLayerInit.set && !frame) DynLayerInit()
  if (ns4) {
	if (!frame) {
	 if (!nestref) var nestref = DynLayerInit.nestRefArray[id]
	  if (!DynLayerTest(id,nestref)) return
		 this.css=(nestref)? eval("document."+nestref+".document."+id) : document.layers[id]
		}
		else this.css=(nestref)? eval("parent."+frame+".document."+nestref+".document."+id) : parent.frames[frame].document.layers[id]
		this.x=this.css.left;
		this.y=this.css.top;
	}
	else if (ie4) {
		this.css=(frame)? parent.frames[frame].document.all[id].style : document.all[id].style;
		this.x=this.css.pixelLeft;
		this.y=this.css.pixelTop;
	}
	
	this.id=id;
	this.w=(ns4)? this.css.clip.width : this.css.pixelWidth;
	this.h=(ns4)? this.css.clip.height : this.css.pixelHeight;
	this.doc=(ns4)? this.css.document : document;
	if (ns4) this.event=this.css;
	if (ie4) this.event=(frame)? parent.frames[frame].document.all[id] : document.all[id];
	this.obj=id+"DynLayer"
	eval(this.obj+"=this")
	this.moveTo=DynLayerMoveTo;
	this.moveBy=DynLayerMoveBy;
	this.show=DynLayerShow;
	this.hide=DynLayerHide;
	this.slideInit=DynLayerSlideInit;
	this.clipInit=DynLayerClipInit;
	this.write=DynLayerWrite;
}

function DynLayerTest(id,nestref) {
	var ref = new Array()
	if (nestref) ref = nestref.split('.document.')
	ref[ref.length] = id
	var refstr = (ns4)? 'document.'+ref[0] : 'document.all.'+ref[0]
	for (var i=1; i<=ref.length; i++) {
		if (eval(refstr)) {
			if (ref.length==i) return true
			else refstr += (ns4)? '.document.'+ref[i] : '.all.'+ref[i]
		}
		else {
			var str ='DynLayer Error:'
			for (j in ref) {
				str += '\n'+ref[j]
				if (j==i-1) str += '  <-- this layer cannot be found'
			}
			if (DynLayerTest.count++<5) alert(str)
			else alert("Too many DynLayer errors, quitting.")
			return false
		}
	}
	return false
}

function DynLayerInit(nestref) {
	if (!DynLayerInit.set) DynLayerInit.set = true
	if (ns4) {
		if (nestref) ref = eval('document.'+nestref+'.document')
		else {nestref = ''; ref = document;}
		for (var i=0; i<ref.layers.length; i++) {
			var divname = ref.layers[i].name
			DynLayerInit.nestRefArray[divname] = nestref
			var index = divname.indexOf("Div")
			if (index > 0) {
				eval(divname.substr(0,index)+' = new DynLayer("'+divname+'","'+nestref+'")')
			}
			if (ref.layers[i].document.layers.length > 0) {
				DynLayerInit.refArray[DynLayerInit.refArray.length] = (nestref=='')? ref.layers[i].name : nestref+'.document.'+ref.layers[i].name
			}
		}
		if (DynLayerInit.refArray.i < DynLayerInit.refArray.length) {
			DynLayerInit(DynLayerInit.refArray[DynLayerInit.refArray.i++])
		}
	}
	else if (ie4) {
		for (var i=0; i<document.all.tags("DIV").length; i++) {
			var divname = document.all.tags("DIV")[i].id
			var index = divname.indexOf("Div")
			if (index > 0) {
				eval(divname.substr(0,index)+' = new DynLayer("'+divname+'")')
			}
		}
	}
	return true
}

function DynLayerMoveTo(x,y) {
	if (x!=null) {
		this.x = x
		this.css.left = this.x
	}
	if (y!=null) {
		this.y = y
		this.css.top = this.y
	}
}

function DynLayerMoveBy(x,y) {this.moveTo(this.x+x,this.y+y)}

function DynLayerShow() {this.css.visibility = (ns4)? "show" : "visible"}

function DynLayerHide() {this.css.visibility = (ns4)? "hide" : "hidden"}

function DynLayerSlideInit() {
	this.slideTo = DynLayerSlideTo;
	this.slideBy = DynLayerSlideBy;
	this.slideStart = DynLayerSlideStart;
	this.slide = DynLayerSlide;
   this.onSlide = new Function("");
	this.onSlideEnd = new Function("");
}

function DynLayerClipInit(clipTop,clipRight,clipBottom,clipLeft) {	this.clipTo = DynLayerClipTo
	this.clipBy = DynLayerClipBy
	this.clipValues = DynLayerClipValues
	if (ie4) {
		if (arguments.length==4) this.clipTo(clipTop,clipRight,clipBottom,clipLeft)
		else this.clipTo(0,this.w,this.h,0)
	}
}

function DynLayerWrite(html) {
	if (ns4) {
		this.doc.open();
		this.doc.write(html);
		this.doc.close();
	}
	else if (ie4) {this.event.innerHTML = html}
}


function initStars() {
 xc=0.5*winW;
 yc=0.5*winH;

 for (var i=0;i<nFarStars;i++) {
  createStar('farStar'+i+'Div',winW*Math.random(),winH*Math.random(),1,bgstarscolor,1);
 }
 for (var i=0;i<nStars;i++) {
  starSize=1+i%2;
  createStar('star'+i+'Div',winW*Math.random(),winH*Math.random(),starSize,starColors[i%starColors.length],1)
  eval('star'+i+' = new DynLayer("star'+i+'Div")')
 }
 setTimeout("moveStars()",starSpeed);
}

function moveStars() {
 for (var i=0;i<nStars;i++) {
  starCoeff=starConst*(1+i%2);
  newX=eval('star'+i+'.x')*(1+starCoeff)-xc*starCoeff;
  newY=eval('star'+i+'.y')*(1+starCoeff)-yc*starCoeff;
  if (newX<0 || newX>winW || newY<0 || newY>winH) {
   newX=winW*(0.5+(Math.random()-0.5)*centerSpot);
   newY=winH*(0.5+(Math.random()-0.5)*centerSpot);
  }
  eval('star'+i+'.moveTo(newX,newY)');
 }
 setTimeout("moveStars()",starSpeed);
}

function createStar(id,left,top,size,bgColor,zIndex) {
 if (ns4) {
  var lyr = document.layers[id] = new Layer(size);
  eval("document."+id+" = lyr");
  lyr.name= id;
  lyr.left= left;
  lyr.top = top;
  lyr.clip.height= size;
  lyr.bgColor= bgColor;
  lyr.visibility= 'show';
  lyr.zIndex= zIndex;
 }
 else if (ie4) {
  var str= '\n<DIV id='+id+' style="position:absolute; left:'+left+'; top:'+top+'; width:'+size;
  str+='; height:'+size;
  str+='; clip:rect(0,'+size+','+size+',0)';
  str+='; background-color:'+bgColor;
  str+='; z-index:'+zIndex;
  str+='; visibility:visible';
  str+=';"></DIV>';
  document.body.insertAdjacentHTML("BeforeEnd",str);
 }
}

function reloadFromCache() {if(bodyLoaded){self.location=''+self.location} }
if (ns4||ie4) window.onresize=reloadFromCache;

if (ns4)
{
 winW=window.innerWidth-17;
 winH=window.innerHeight-17;
}

if (ie4)
{
 winW=document.body.offsetWidth-22;
 winH=document.body.offsetHeight-22;
}

if (ns4 || ie4) setTimeout("initStars()",100);

//not using in this script
if(ie4) string='<h1 align="center"><b><font face="Arial Black">Through the Universe</font></b></h1><div style="position:absolute;width:100%;top:85%;text-align:center;font-family:Arial Black;font-size:30px;font-weight:bold"><a href="http://JavaScriptBank.com">JavaScriptBank.com</a></div>';
if (ns4) string='<h1 align="center"><b><font face="Arial Black">Through the Universe</font></b></h1><br><br><br><br><br><p align="center"><font face="Arial Black" size=7><a href="http://JavaScriptBank.com">Free JavaScripts</a></font></p>';
document.write(string);
//-->
</SCRIPT>
	<!--
    	This script downloaded from www.JavaScriptBank.com
    	Come to view and download over 2000+ free javascript at www.JavaScriptBank.com
	-->


Bạn có thể xem các mã tương tự bên dưới
- [URL="http://www.javascriptbank.com/crawling-content.html/vi/"]Nội dung di chuyển
- YUI - Thư viện giao diện người dùng của Yahoo
- Khóa nút Submit bằng thuộc tính disabled
Bạn có thể xem thêm nhiều JavaScript khác về MultimediaSự kiện


Đồng hồ đếm ngược

Đoạn mã này sẽ tạo một đồng hồ đếm ngược trên trang web (trong ví dụ là 10 phút), kh... chi tiết


Demo: Đồng hồ đếm ngược
| Cách cài đặt[/SIZE]

Bước 1: Copy mã CSS bên dưới và dán vào khu vực HEAD trên trang web của bạn
CSS
Mã:
<style type="text/css">
#txt {
  border:none;
  font-family:verdana;
  font-size:16pt;
  font-weight:bold;
  border-right-color:#FFFFFF
}

</style>
	<!--
    	This script downloaded from www.JavaScriptBank.com
    	Come to view and download over 2000+ free javascript at www.JavaScriptBank.com
	-->

Bước 2: Copy mã JavaScript bên dưới và dán vào khu vực HEAD trên trang web của bạn
JavaScript
Mã:
<script language="javascript">
// Created by: Neill Broderick :: http://www.bespoke-software-solutions.co.uk/downloads/downjs.php

var mins
var secs;

function cd() {
 	mins = 1 * m("10"); // change minutes here
 	secs = 0 + s(":01"); // change seconds here (always add an additional second to your total)
 	redo();
}

function m(obj) {
 	for(var i = 0; i < obj.length; i++) {
  		if(obj.substring(i, i + 1) == ":")
  		break;
 	}
 	return(obj.substring(0, i));
}

function s(obj) {
 	for(var i = 0; i < obj.length; i++) {
  		if(obj.substring(i, i + 1) == ":")
  		break;
 	}
 	return(obj.substring(i + 1, obj.length));
}

function dis(mins,secs) {
 	var disp;
 	if(mins <= 9) {
  		disp = " 0";
 	} else {
  		disp = " ";
 	}
 	disp += mins + ":";
 	if(secs <= 9) {
  		disp += "0" + secs;
 	} else {
  		disp += secs;
 	}
 	return(disp);
}

function redo() {
 	secs--;
 	if(secs == -1) {
  		secs = 59;
  		mins--;
 	}
 	document.cd.disp.value = dis(mins,secs); // setup additional displays here.
 	if((mins == 0) && (secs == 0)) {
  		window.alert("Time is up. Press OK to continue."); // change timeout message as required
  		// window.location = "yourpage.htm" // redirects to specified page once timer ends and ok button is pressed
 	} else {
 		cd = setTimeout("redo()",1000);
 	}
}

function init() {
  cd();
}
window.onload = init;
</script>
	<!--
    	This script downloaded from www.JavaScriptBank.com
    	Come to view and download over 2000+ free javascript at www.JavaScriptBank.com
	-->

Bước 3: Copy mã HTML bên dưới và dán vào khu vực BODY trên trang web của bạn
HTML
Mã:
<form name="cd">
<input id="txt" readonly="true" type="text" value="10:00" border="0" name="disp">
</form>
	<!--
    	This script downloaded from www.JavaScriptBank.com
    	Come to view and download over 2000+ free javascript at www.JavaScriptBank.com
	-->


Đoạn mã tương tự
- [URL="http://www.javascriptbank.com/12-24-hour-format-clock.html/vi/"]Đồng hồ định dạng 12/24 giờ
- Tạo thời gian đếm ngược
- Đồng hồ trong textbox
Bạn có thể xem thêm nhiều JavaScript khác về Thời gianBộ đếm


Trình chơi nhạc

Hãy mang âm nhạc - giai điệu của cuộc sống vào trang web của bạn bằng hiệu ứng này. Hiệu ứng tạo một trình chơi nhạc dạng đơn giản trên trang web với các... chi tiết


Cách cài đặt

Bước 1: Copy mã JavaScript bên dưới và dán vào khu vực HEAD trên trang web của bạn
JavaScript
Mã:
<SCRIPT language=JavaScript>
<!-- Begin
counter = 0;
html = true;
songs = new Array();
function addsong() {
file = document.forms[0].file.value;
if(file == "") {
alert("Entra un nombre de archivo o da click en Examinar..");
}
else {
fn = file;
while(fn.indexOf() != -1) {
pos = fn.indexOf();
fn = fn.substring(fn.lenght);
}
if(fn.indexOf(".gif") == 1) {
alert("Sólo sonidos o música");
}
else {
songs[counter] = file;
document.forms[0].selMusica[counter] = new Option(fn, file, false, true);
counter++;
}
document.forms[0].file.value = "";
}
}
function musica() {
document.all.sound.src=document.clock.selMusica.options[document.clock.selMusica.selectedIndex].text;
}
function stop() {
document.all.sound.src="";
}
function count() {
document.clock.songs.value=document.clock.selMusica.options.length;
}
function deletethis() {
if(counter > 0) {
counter--;
document.forms[0].selMusica[counter] = null;
songs[counter] = "";
}
else {
alert("No hay nada en la lista!");
   }
}
function bajar() {
document.clock.selMusica.options[document.clock.selMusica.selectedIndex++];
saber2();
saber();
}
function subir() {
document.clock.selMusica.options[document.clock.selMusica.selectedIndex--];
saber2();
saber();
}
function saber() {
document.clock.url.value=document.clock.selMusica.options[document.clock.selMusica.selectedIndex].text;
}
function saber2() {
fn = document.clock.selMusica.options[document.clock.selMusica.selectedIndex].text;
char = unescape("%5C");
while(fn.indexOf(char) != -1) {
pos = fn.indexOf(char);
fn = fn.substring(pos + 1, fn.length);
document.clock.nombre.value=fn;
}
}
// End-->
</SCRIPT>

Bước 2: Copy mã HTML bên dưới và dán vào khu vực BODY trên trang web của bạn
HTML
Mã:
<BODY onclick=count() onload=count()>
<BGSOUND id=sound src="">
<FORM name=clock><INPUT type=file name=file size="20"> <INPUT onclick=addsong() type=button value=Add><INPUT onclick=deletethis() type=button value=Delete><BR><INPUT onclick=musica() type=button value=Listen name=empezar> 
<INPUT onclick=stop() type=button value=Stop name=detener> You have:<INPUT 
readOnly size=2 name=songs>song(s) in the list.<BR>Name of the song:<INPUT 
size=25 name=nombre><INPUT onclick="saber2(); saber()" type=button value="Know Name & Url">Url 
	of the song:<INPUT size=19 name=url> <BR><INPUT onclick=bajar() type=button value=MoveDown><INPUT onclick=subir() type=button value=MoveUp><BR><BR><SELECT 
multiple size=20 name=selMusica></SELECT> </FORM>
</BODY>


Bạn có thể xem các mã tương tự bên dưới
- Trình đơn động nhiều cấp
- Kiểm tra thông tin trình duyệt
- Trình xem kết quả giảm cân


Một vài nhãn tương tự: trình chơi nhạc, âm nhạc, chơi nhạc, giai điệu, cuộc sống, đơn giản, chức năng, chọn bài hát, thêm bài hát, xóa bài hát, danh sách, bài hát
Bạn có thể xem thêm nhiều JavaScript khác về MultimediaÂm thanh


Mở liên kết trong tab/cửa sổ mới

Sử dụng đoạn mã JavaScript đơn giản này để làm cho tất cả các liên kết trong trang web của bạn được mở tro... chi tiết tại JavaScriptBank.com - 2.000+ free JavaScript codes


Cách cài đặt

Bước 1: Copy mã JavaScript bên dưới và dán vào khu vực HEAD trên trang web của bạn
JavaScript
Mã:
<script language=javascript>
/*
	Kevin Yank
	http://www.sitepoint.com/authorcontact/48
*/
function externalLinks()
{
  if (!document.getElementsByTagName) return;
  var anchors = document.getElementsByTagName("a");
  for (var i=0; i<anchors.length; i++)
  {
      var anchor = anchors[i];
      if(anchor.getAttribute("href"))
		anchor.target = "_blank";
  }
}
window.onload = externalLinks;

</script>
	<!--
    	This script downloaded from www.JavaScriptBank.com
    	Come to view and download over 2000+ free javascript at www.JavaScriptBank.com
	-->

Bước 2: Copy mã HTML bên dưới và dán vào khu vực BODY trên trang web của bạn
HTML
Mã:
<a href="http://javascriptbank.com/">Home</a> | 
	<a href="http://javascriptbank.com/4rum/">Forum</a> | 
	<a href="http://javascriptbank.com/javascript/">JavaScript</a> | 
	<a href="http://javascriptbank.com/service/">Services</a> | 
	<a href="http://javascriptbank.com/javascript/submit-javascript-bank.html">Submit script</a> | 
	<a href="http://javascriptbank.com/thietkeweb/javascriptmall/">Documentary</a> | 
	<a href="http://javascriptbank.com/javascript/contact-javascript-bank.html">Contact us</a> | 
	<a href="http://javascriptbank.com/javascript/aboutus-javascript-bank.html">About us</a>
	<!--
    	This script downloaded from www.JavaScriptBank.com
    	Come to view and download over 2000+ free javascript at www.JavaScriptBank.com
	-->


Bạn có thể xem các mã tương tự bên dưới
- Tùy chọn mở liên kết
- Liệt kê các liên kết trong mảng
- Mở liên kết trong cửa sổ mới
Bạn có thể xem thêm nhiều JavaScript khác về Liên kết


10 JavaScript framework hàng đầu theo Google, Yahoo, Bing

JavaScript - một nhân tố không thể thiếu trong việc thiết kế và phát triển web; cho dù đó là chỉ một trang web đơn giản hay là một website chuyên nghiệp, cho dù ... chi tiết tại JavaScriptBank.com - 2.000+ free JavaScript codes


Cách cài đặt


Một vài nhãn tương tự: 10, framework, hàng đầu, Google, Yahoo, Bing, thiết kế web, phát triển web, đơn giản, chuyên nghiệp, dân nghiệp dư, chuyên viên, mạnh mẽ, chuyên biệt, phổ biến, thứ tự, tìm ki
Bạn có thể xem thêm nhiều JavaScript khác về Bi vi?t


Bộ chọn ngày với cửa sổ phụ

Hiệu ứng này giúp bạn chọn một thời điểm nào đó thông qua một cửa sổ popup phụ. Tính năng chọn thời điểm có lẽ không ... chi tiết tại JavaScriptBank.com - 2.000+ free JavaScript codes


Cách cài đặt

Bước 1: Đặt mã JavaScript bên dưới vào phần HEAD
JavaScript
Mã:
<script language="JavaScript" type="text/javascript" src="timePicker.js">
/*
	Bassem R. Zohdy | bassem.zohdy@gmail.com
*/
</script>

Bước 2: Đặt mã HTML bên dưới vào phần BODY
HTML
Mã:
<form name="form1">
	<input id="field" onkeydown="time(this.id)"/>
</form>

Bước 3: Tải các file bên dưới về
Files
down.jpg
time.html
timePicker.js
up.jpg


Hiệu ứng cùng chức năng
- Mở liên kết trong cửa sổ mới
- Cửa sổ popup tự động trượt
- Mở liên kết trong các cửa sổ mới


Một vài nhãn tương tự: bộ chọn, ngày, cửa sổ, thời điểm, popup, điều khiển, ActiveX, Internet Explorer, cho phép
Bạn có thể xem thêm nhiều JavaScript khác về Thời gianĐồng hồ


Slideshow mờ ảo

Một đoạn mã JavaScript khác để tạo hiệu ứng ảnh thay đổi mờ ảo trên trang web.... chi tiết tại JavaScriptBank.com - 2.000+ free JavaScript codes


Cách cài đặt

Bước 1: Copy mã JavaScript bên dưới và dán vào khu vực HEAD trên trang web của bạn
JavaScript
Mã:
<script>
/* 
	Original:  CodeLifter.com (support@codelifter.com)
	Web Site:  http://www.codelifter.com 
*/

// set the following variables
// Set slideShowSpeed (milliseconds)
var slideShowSpeed = 5000

// Duration of crossfade (seconds)
var crossFadeDuration = 3

// Specify the image files
var Pic = new Array() // don't touch this
// to add more images, just continue
// the pattern, adding to the array below
Pic[0] = 'logojs.gif'
Pic[1] = 'photo3.jpg'
Pic[2] = 'logojs.gif'
Pic[3] = 'photo5.jpg'
Pic[4] = 'photo2.jpg'

// do not edit anything below this line

var t
var j = 0
var p = Pic.length
var preLoad = new Array()
for (i = 0; i < p; i++){
   preLoad[i] = new Image()
   preLoad[i].src = Pic[i]
}

function runSlideShow(){
   if (document.all){
      document.images.SlideShow.style.filter="blendTrans(duration=2)"
      document.images.SlideShow.style.filter="blendTrans(duration=crossFadeDuration)"
      document.images.SlideShow.filters.blendTrans.Apply()      
   }
   document.images.SlideShow.src = preLoad[j].src
   if (document.all){
      document.images.SlideShow.filters.blendTrans.Play()
   }
   j = j + 1
   if (j > (p-1)) j=0
   t = setTimeout('runSlideShow()', slideShowSpeed)
}
</script>
	<!--
    	This script downloaded from www.JavaScriptBank.com
    	Come to view and download over 2000+ free javascript at www.JavaScriptBank.com
	-->

Bước 2: Copy mã HTML bên dưới và dán vào khu vực BODY trên trang web của bạn
HTML
Mã:
<body onLoad="runSlideShow()">
<img id="VU" src="logojs.gif" name='SlideShow'>
</body>
	<!--
    	This script downloaded from www.JavaScriptBank.com
    	Come to view and download over 2000+ free javascript at www.JavaScriptBank.com
	-->


Hiệu ứng cùng chức năng
- Bàn phím ảo
- Chữ mờ dần
- Kĩ thuật làm mờ màu nền
Bạn có thể xem thêm nhiều JavaScript khác về Hình ảnhTrình diễn ảnh


Bàn phím ảo

Một đoạn mã JavaScript tạo công cụ bàn phím ảo trên trang web cho thao tác nhập liệu.

Bàn phím ảo này hỗ tr... chi tiết tại JavaScriptBank.com - 2.000+ free JavaScript codes


Cách cài đặt

Bước 1: Đặt mã JavaScript bên dưới vào phần HEAD
JavaScript
Mã:
<script type="text/javascript" src="vk_loader.js" ></script>
	<!--
    	This script downloaded from www.JavaScriptBank.com
    	Come to view and download over 2000+ free javascript at www.JavaScriptBank.com
	-->

Bước 2: Copy mã HTML bên dưới và dán vào khu vực BODY trên trang web của bạn
HTML
Mã:
<form action="no.cgi" method="get">
      <div>
       Subject:<br />

       <input name="testa" id="testa" type="text" onfocus="VirtualKeyboard.attachInput(this)" /><br />
       Password (has keyboard animation disabled):<br />
       <input name="test_pwd" id="test_pwd" type="password" class="VK_no_animate" onfocus="VirtualKeyboard.attachInput(this)" /><br />
       Text:<br />
       <textarea name="testb" id="testb" type="text" cols="55" rows="10" wrap="soft" onfocus="VirtualKeyboard.attachInput(this)"></textarea>
       <br />
       <br />

       <div id="td"></div>
       <br />
       <input id="showkb" type="button" value="Keyboard" onclick="VirtualKeyboard.toggle('testb','td'); return false;" />
      </div>
      <div id="dbg">
      </div>
     </form>
     <script type="text/javascript">
         EM.addEventListener(window,'domload',function(){
             /*
             *  open the keyboard
             */
             VirtualKeyboard.toggle('testb','td');
             var el = document.getElementById('sul')
                ,lt = VirtualKeyboard.getLayouts()
                ,dl = window.location.href.replace(/[?#].+/,"")
             for (var i=0,lL=lt.length; i<lL; i++) {
                 var cl = lt[i];
                 cl = cl[0]+" "+cl[1];
                 lt[i] = "<a href=\""+dl+"?vk_layout="+cl+"\" onclick=\"VirtualKeyboard.switchLayout(this.title);return false;\" title=\""+cl+"\" alt=\""+cl+"\" >"+cl+"</a>"
             }
             el.innerHTML += "<li>"+lt.join("</li><li>")+"</li>";
         });
     </script>
	<!--
    	This script downloaded from www.JavaScriptBank.com
    	Come to view and download over 2000+ free javascript at www.JavaScriptBank.com
	-->

Bước 3: tải các file
Files
Virtual_Keyboard.zip


Đoạn mã tương tự
- Chữ động kiểu gõ phím
- Trình soạn thảo văn bản WYSIWYG mã nguồn mở
- Bàn phím ảo
Bạn có thể xem thêm nhiều JavaScript khác về Ứng dụng


Tự động tải lại trang web

Đoạn mã này sử dụng JavaScript để làm cho trình duyệt tự động tải lại nội dung của trang web sau mỗi 5 phú... chi tiết tại JavaScriptBank.com - 2.000+ free JavaScript codes


Cách cài đặt

Bước 1: Copy mã JavaScript bên dưới và dán vào khu vực HEAD trên trang web của bạn
JavaScript
Mã:
<script type="text/javascript">
<!-- Begin
// Created by: Lee Underwood
function reFresh() {
  window.open(location.reload(true))
}
/* Set the number below to the amount of delay, in milliseconds,
you want between page reloads: 1 minute = 60000 milliseconds. */
window.setInterval("reFresh()",300000);
// End -->
</script>
	<!--
    	This script downloaded from www.JavaScriptBank.com
    	Come to view and download over 2000+ free javascript at www.JavaScriptBank.com
	-->


Các hiệu ứng tương tự
- Điền dữ liệu tự động
- Cửa sổ popup tự động trượt
- Lấy địa chỉ của trang web refer
Bạn có thể xem thêm nhiều JavaScript khác về Trình duyệtCửa sổ


Kiểm tra Email

Hiệu ứng sẽ kiểm tra xem chuỗi do người dùng nhập vào có đúng là một dạng thư điện tử hợp lệ kh... chi tiết tại JavaScriptBank.com - 2.000+ free JavaScript codes


Cách cài đặt

Bước 1: Dùng mã JavaScript để cài đặt hiệu ứng
JavaScript
Mã:
<script language="javascript">
// Created by: Francis Cocharrua :: http://scripts.franciscocharrua.com/

function Validate_String(string, return_invalid_chars) {
  valid_chars = '1234567890-_.^~abcdefghijklmnopqrstuvwxyzABCDEFGHIJKLMNOPQRSTUVWXYZ';
  invalid_chars = '';
  if(string == null || string == '')
     return(true);

  //For every character on the string.   
  for(index = 0; index < string.length; index++) {
    char = string.substr(index, 1);                        
     
    //Is it a valid character?
    if(valid_chars.indexOf(char) == -1) {
      //If not, is it already on the list of invalid characters?
      if(invalid_chars.indexOf(char) == -1) {
        //If it's not, add it.
        if(invalid_chars == '')
          invalid_chars += char;
        else
          invalid_chars += ', ' + char;
      }
    }
  }
            
  //If the string does not contain invalid characters, the function will return true.
  //If it does, it will either return false or a list of the invalid characters used
  //in the string, depending on the value of the second parameter.
  if(return_invalid_chars == true && invalid_chars != '') {
    last_comma = invalid_chars.lastIndexOf(',');
    if(last_comma != -1)
      invalid_chars = invalid_chars.substr(0, $last_comma) + 
      ' and ' + invalid_chars.substr(last_comma + 1, invalid_chars.length);
    return(invalid_chars);
    }
  else
    return(invalid_chars == ''); 
}


function Validate_Email_Address(email_address){
  // Modified and tested by Thai Cao Phong, JavaScriptBank.com
  //Assumes that valid email addresses consist of user_name@domain.tld
  
  at = email_address.indexOf('@');
  dot = email_address.indexOf('.');

  if(at == -1 || 
    dot == -1 || 
    dot <= at + 1 ||
    dot == 0 || 
    dot == email_address.length - 1)
  {
  	alert("Invalid email");
    return(false);
  }
     
  user_name = email_address.substr(0, at);
  domain_name = email_address.substr(at + 1, email_address.length);                  

  if(Validate_String(user_name) === false || Validate_String(domain_name) === false)
  {
  	alert("Invalid email");
    return(false);
  }

  alert("Valid email");//return(true);
}
</script>
	<!--
    	This script downloaded from www.JavaScriptBank.com
    	Come to view and download over 2000+ free javascript at www.JavaScriptBank.com
	-->

Bước 2: Copy mã HTML bên dưới và dán vào khu vực BODY trên trang web của bạn
HTML
Mã:
<form name=f>
<input type=text name=mail value="">
<input type=button value=Check onclick="Validate_Email_Address(document.f.mail.value)">
</form>
	<!--
    	This script downloaded from www.JavaScriptBank.com
    	Come to view and download over 2000+ free javascript at www.JavaScriptBank.com
	-->


Đoạn mã tương tự
- 9 trình đơn định hướng dạng cây thư mục hữu ích
- Các trình biên tập web miễn phí và tốt nhất trên Linux
- Các trình đơn định hướng tốt nhất cho thiết kế dùng jQuery
Bạn có thể xem thêm nhiều JavaScript khác về Email


10 bộ đếm đến ngày Giáng sinh đẹp nhất

Chỉ còn vài ngày nữa là Nô-en sẽ đến, và nếu bạn vẫn còn đang tìm kiếm một bộ đếm cho ngày Giáng sinh trên trang web của mình thì tôi nghĩ đây là bài vi... chi tiết tại JavaScriptBank.com - 2.000+ free JavaScript codes


Cách cài đặt


Một vài nhãn tương tự: 10, bộ đếm, ngày Giáng sinh, đẹp nhất, Giáng sinh, Nô-en, hữu ích, danh sách, hiệu ứng bộ đếm, Flash, HTML + JavaScript, phiên bản thương mại
Bạn có thể xem thêm nhiều JavaScript khác về Bi vi?t


Biểu đồ đoạn thẳng

Hiệu ứng sẽ vẽ một biểu đồ đoạn thẳng với các số liệu do bạn qui định trước.... chi tiết tại JavaScriptBank.com - 2.000+ free JavaScript codes


Cách cài đặt

Bước 1: Copy mã JavaScript bên dưới và dán vào khu vực HEAD trên trang web của bạn
JavaScript
Mã:
<script type="text/javascript" src="wz_jsgraphics.js"></script>
<script type="text/javascript" src="line.js"></script>
	<!--
    	This script downloaded from www.JavaScriptBank.com
    	Come to view and download over 2000+ free javascript at www.JavaScriptBank.com
	-->

Bước 2: Đặt mã HTML bên dưới vào phần BODY
HTML
Mã:
<div id="lineCanvas" style="overflow: auto; position:relative;height:300px;width:400px;"></div>

<script type="text/javascript">
var g = new line_graph();
g.add('1', 145);
g.add('2', 0);
g.add('3', 175);
g.add('4', 130);
g.add('5', 150);
g.add('6', 175);
g.add('7', 205);
g.add('8', 125);
g.add('9', 125);
g.add('10', 135);
g.add('11', 125);

g.render("lineCanvas", "Line Graph");
</script>
	<!--
    	This script downloaded from www.JavaScriptBank.com
    	Come to view and download over 2000+ free javascript at www.JavaScriptBank.com
	-->

Bước 3: tải các file
Files
line.js
wz_jsgraphics.js


Hiệu ứng cùng chức năng
- Biểu đồ hình tròn
- Đồng hồ biểu đồ
- Cột biểu đồ
Bạn có thể xem thêm nhiều JavaScript khác về Đồ họa


Tuyết rơi dùng hình ảnh

Đây là một đoạn mã khác để tạo cảnh tuyết rơi trên trang web bằng cách sử dụng hình ảnh làm các bông tuyết.... chi tiết tại JavaScriptBank.com - 2.000+ free JavaScript codes


Cách cài đặt

Bước 1: Đặt mã JavaScript bên dưới vào phần HEAD
JavaScript
Mã:
<script type="text/javascript">

/******************************************
* Snow Effect Script- By Altan d.o.o. (http://www.altan.hr/snow/index.html)
******************************************/
  
  //Configure below to change URL path to the snow image
  var snowsrc="snow3.gif"
  // Configure below to change number of snow to render
  var no = 10;
  // Configure whether snow should disappear after x seconds (0=never):
  var hidesnowtime = 0;
  // Configure how much snow should drop down before fading ("windowheight" or "pageheight")
  var snowdistance = "pageheight";

///////////Stop Config//////////////////////////////////

  var ie4up = (document.all) ? 1 : 0;
  var ns6up = (document.getElementById&&!document.all) ? 1 : 0;

	function iecompattest(){
	return (document.compatMode && document.compatMode!="BackCompat")? document.documentElement : document.body
	}

  var dx, xp, yp;    // coordinate and position variables
  var am, stx, sty;  // amplitude and step variables
  var i, doc_width = 800, doc_height = 600; 
  
  if (ns6up) {
    doc_width = self.innerWidth;
    doc_height = self.innerHeight;
  } else if (ie4up) {
    doc_width = iecompattest().clientWidth;
    doc_height = iecompattest().clientHeight;
  }

  dx = new Array();
  xp = new Array();
  yp = new Array();
  am = new Array();
  stx = new Array();
  sty = new Array();
  snowsrc=(snowsrc.indexOf("dynamicdrive.com")!=-1)? "snow.gif" : snowsrc
  for (i = 0; i < no; ++ i) {  
    dx[i] = 0;                        // set coordinate variables
    xp[i] = Math.random()*(doc_width-50);  // set position variables
    yp[i] = Math.random()*doc_height;
    am[i] = Math.random()*20;         // set amplitude variables
    stx[i] = 0.02 + Math.random()/10; // set step variables
    sty[i] = 0.7 + Math.random();     // set step variables
		if (ie4up||ns6up) {
      if (i == 0) {
        document.write("<div id="dot"+ i +"" style="POSITION: absolute; Z-INDEX: "+ i +"; VISIBILITY: visible; TOP: 15px; LEFT: 15px;"><a href="http://dynamicdrive.com"><img src='"+snowsrc+"' border="0"></a></div>");
      } else {
        document.write("<div id="dot"+ i +"" style="POSITION: absolute; Z-INDEX: "+ i +"; VISIBILITY: visible; TOP: 15px; LEFT: 15px;"><img src='"+snowsrc+"' border="0"></div>");
      }
    }
  }

  function snowIE_NS6() {  // IE and NS6 main animation function
    doc_width = ns6up?window.innerWidth-10 : iecompattest().clientWidth-10;
		doc_height=(window.innerHeight && snowdistance=="windowheight")? window.innerHeight : (ie4up && snowdistance=="windowheight")?  iecompattest().clientHeight : (ie4up && !window.opera && snowdistance=="pageheight")? iecompattest().scrollHeight : iecompattest().offsetHeight;
    for (i = 0; i < no; ++ i) {  // iterate for every dot
      yp[i] += sty[i];
      if (yp[i] > doc_height-50) {
        xp[i] = Math.random()*(doc_width-am[i]-30);
        yp[i] = 0;
        stx[i] = 0.02 + Math.random()/10;
        sty[i] = 0.7 + Math.random();
      }
      dx[i] += stx[i];
      document.getElementById("dot"+i).style.top=yp[i]+"px";
      document.getElementById("dot"+i).style.left=xp[i] + am[i]*Math.sin(dx[i])+"px";  
    }
    snowtimer=setTimeout("snowIE_NS6()", 10);
  }

	function hidesnow(){
		if (window.snowtimer) clearTimeout(snowtimer)
		for (i=0; i<no; i++) document.getElementById("dot"+i).style.visibility="hidden"
	}
		

if (ie4up||ns6up){
    snowIE_NS6();
		if (hidesnowtime>0)
		setTimeout("hidesnow()", hidesnowtime*1000)
		}

</script>

Bước 2: các file cần tải
Files
snow3.gif


Đoạn mã tương tự
- Đồng hồ số dùng hình ảnh
- Tuyết rơi
- Tuyết rơi


Một vài nhãn tương tự: tuyết rơi, hình ảnh, bông tuyết
Bạn có thể xem thêm nhiều JavaScript khác về MultimediaSự kiện


Thời gian của thế giới

Hiệu ứng sẽ hiển thị thời gian của một số thành phố trên thế giới với cách thức khá lạ mắt. Hiệu ứng sẽ hiển thị giây ch... chi tiết tại JavaScriptBank.com - 2.000+ free JavaScript codes


Cách cài đặt

Bước 1: Đặt mã CSS bên dưới vào phần HEAD
CSS
Mã:
<STYLE>
.topcoverlay {
	BACKGROUND-COLOR: #ffffff; FILTER: alpha(opacity=85); HEIGHT: 240px; LEFT: 0px; POSITION: absolute; TOP: 0px; WIDTH: 1000px
}
.bottomcoverlay {
	BACKGROUND-COLOR: #ffffff; FILTER: alpha(opacity=85); HEIGHT: 1000px; LEFT: 0px; POSITION: absolute; TOP: 253px; WIDTH: 1000px
}
</STYLE>
	<!--
    	This script downloaded from www.JavaScriptBank.com
    	Come to view and download over 2000+ free javascript at www.JavaScriptBank.com
	-->

Bước 2: Copy mã JavaScript bên dưới và dán vào khu vực HEAD trên trang web của bạn
JavaScript
Mã:
<SCRIPT language=JavaScript>
<!-- Beginning of JavaScript -


var startpos=240
var bildhoehe=720
var step=3
var makepause=200
var difference=0
var local=1
var timer

function showtimelocal() {
	if (local==1) {
		var  thistime= new Date()
		var seconds=thistime.getSeconds()
		var minutes=thistime.getMinutes()
		var hours=thistime.getHours()
		if (hours>=24) {hours=hours-24}
		var secondspos=Math.floor(bildhoehe/60*seconds)
		var minutespos=Math.floor(bildhoehe/60*minutes)
		var hourspos=Math.floor(bildhoehe/60*hours)
		
		if(document.all) {
			document.all.secondsdiv.style.posTop=startpos-secondspos
			document.all.minutesdiv.style.posTop=startpos-minutespos
			document.all.hoursdiv.style.posTop=startpos-hourspos
		}
		
		if(document.layers) {
			document.secondsdiv.top=startpos-secondspos
			document.minutesdiv.top=startpos-minutespos
			document.hoursdiv.top=startpos-hourspos
		}
		var timer=setTimeout("showtimelocal()",makepause)
	}
	else {
		clearTimeout(timer)
	}
}

function preUTC(thisdifference) {
	clearTimeout(timer)
	difference=eval(thisdifference)
	local=0
	showtimeUTC()
}

function inititate() {
	if (document.layers) {
		document.markernetscape1.visibility="VISIBLE"
		document.markernetscape2.visibility="VISIBLE"
	}
	showtimelocal()
}

function prelocal() {
	if (document.layers) {document.markernetscape.visibility="VISIBLE"}
	clearTimeout(timer)
	local=1
	showtimelocal()
}

function showtimeUTC() {
	if (local==0) {
		var  thistime= new Date()
		var seconds=thistime.getSeconds()
		var minutes=thistime.getMinutes()
		var hours=thistime.getUTCHours()
		hours+=difference
		if (hours>=24) {hours=hours-24}
		var secondspos=Math.floor(bildhoehe/60*seconds)
		var minutespos=Math.floor(bildhoehe/60*minutes)
		var hourspos=Math.floor(bildhoehe/60*hours)
		
		if(document.all) {
			document.all.secondsdiv.style.posTop=startpos-secondspos
			document.all.minutesdiv.style.posTop=startpos-minutespos
			document.all.hoursdiv.style.posTop=startpos-hourspos
		}
		
		if(document.layers) {
			document.secondsdiv.top=startpos-secondspos
			document.minutesdiv.top=startpos-minutespos
			document.hoursdiv.top=startpos-hourspos
		}
		var timer=setTimeout("showtimeUTC()",makepause)
	}
	else {
		clearTimeout(timer)
	}
}

window.onload=inititate
// - End of JavaScript - -->
</SCRIPT>
	<!--
    	This script downloaded from www.JavaScriptBank.com
    	Come to view and download over 2000+ free javascript at www.JavaScriptBank.com
	-->

Bước 3: Copy mã HTML bên dưới và dán vào khu vực BODY trên trang web của bạn
HTML
Mã:
<DIV id=secondsdiv style="LEFT: 200px; POSITION: absolute; TOP: 240px">
  <IMG 
src="rotaclock2930.gif" width="14" height="720"></DIV>
<DIV id=minutesdiv style="LEFT: 180px; POSITION: absolute">
  <IMG 
src="rotaclock2930.gif" width="14" height="720"></DIV>
<DIV id=hoursdiv style="LEFT: 160px; POSITION: absolute; TOP: 240px">
  <IMG 
src="rotaclock2930.gif" width="14" height="720"></DIV>
<DIV class=topcoverlay id=topcover></DIV>
<DIV class=bottomcoverlay id=bottomcover></DIV>
<DIV id=limiter1 
style="COLOR: #ff0000; FONT-FAMILY: Arial; FONT-SIZE: 8pt; FONT-WEIGHT: bold; LEFT: 176px; POSITION: absolute; TOP: 241px">
	:</DIV>
<DIV id=limiter2 
style="COLOR: #ff0000; FONT-FAMILY: Arial; FONT-SIZE: 8pt; FONT-WEIGHT: bold; LEFT: 196px; POSITION: absolute; TOP: 241px">
	:</DIV>
<DIV id=markernetscape1 
style="COLOR: #ff0000; FONT-FAMILY: Arial; FONT-SIZE: 12pt; FONT-WEIGHT: bold; LEFT: 122px; POSITION: absolute; TOP: 248px; VISIBILITY: hidden"><IMG 
height=1 src="line2930.gif" width=20></DIV>
<DIV id=markernetscape2 
style="COLOR: #ff0000; FONT-FAMILY: Arial; FONT-SIZE: 12pt; FONT-WEIGHT: bold; LEFT: 230px; POSITION: absolute; TOP: 248px; VISIBILITY: hidden"><IMG 
height=1 src="js 46_files/line2930.gif" width=20></DIV>
<DIV id=timezones 
style="COLOR: #ff0000; FONT-FAMILY: Arial; FONT-SIZE: 8pt; LEFT: 10px; POSITION: absolute; TOP: 5px"><A 
href="#" 
onmouseover=prelocal()>&gt;&gt; local time</A><BR><A 
href="#" 
onmouseover="preUTC('-8')">Anchorage</A><BR><A 
href="#" 
onmouseover="preUTC('-11')">Auckland</A><BR><A 
href="#" 
onmouseover="preUTC('3')">Baghdad</A><BR><A 
href="#" 
onmouseover="preUTC('8')">Bejing</A><BR><A 
href="#" 
onmouseover="preUTC('-3')">Buenos Aires</A><BR><A 
href="#" 
onmouseover="preUTC('-6')">Denver</A><BR><A 
href="#" 
onmouseover="preUTC('8')">Hongkong</A><BR><A 
href="#" 
onmouseover="preUTC('-9')">Honolulu</A><BR><A 
href="#" 
onmouseover="preUTC('8')">Jakarta</A><BR><A 
href="#" 
onmouseover="preUTC('2')">Johannesburg</A><BR><A 
href="#" 
onmouseover="preUTC('2')">Kairo</A><BR><A 
href="#" 
onmouseover="preUTC('-5')">Lima</A><BR><A 
href="#" 
onmouseover="preUTC('1')">London</A><BR><A 
href="#" 
onmouseover="preUTC('-7')">Los Angeles</A><BR><A 
href="#" 
onmouseover="preUTC('4')">Moscow</A><BR><A 
href="#" 
onmouseover="preUTC('3')">Nairobi</A><BR><A 
href="#" 
onmouseover="preUTC('-4')">New York</A><BR><A 
href="#" 
onmouseover="preUTC('2')">Paris</A><BR><A 
href="#" 
onmouseover="preUTC('-2')">Rio</A><BR><A 
href="#" 
onmouseover="preUTC('10')">Sydney</A><BR><A 
href="#" 
onmouseover="preUTC('9')">Tokyo</A><BR></DIV>
	<!--
    	This script downloaded from www.JavaScriptBank.com
    	Come to view and download over 2000+ free javascript at www.JavaScriptBank.com
	-->

Bước 4: tải các file
Files
rotaclock2930.gif


Các hiệu ứng tương tự
- Thời gian các nơi (so với Nhật)
- Chuyển trang với khoảng thời gian
- Thời gian ở trên trang web
Bạn có thể xem thêm nhiều JavaScript khác về Thời gianĐồng hồ


Phóng to ảnh

Hiệu ứng giúp người dùng phóng to ảnh bằng một cú nhấn trái chuột và làm cho ảnh có kích thước bình thường trở lại bằng một... chi tiết tại JavaScriptBank.com - 2.000+ free JavaScript codes


Cách cài đặt

Bước 1: Đặt mã HTML bên dưới vào phần BODY
HTML
Mã:
<b>Single-click the image to enlarge it; double-click to make it small again.</b><br>

<img src="gif_logojsb2.gif" onclick="this.src='gif_logojsb2.gif';this.height=180;this.width=480" ondblclick="this.src='gif_logojsb2.gif';this.height=60;this.width=150">
	<!--
    	This script downloaded from www.JavaScriptBank.com
    	Come to view and download over 2000+ free javascript at www.JavaScriptBank.com
	-->


Các hiệu ứng tương tự
- MooTools: Thư viện JavaScript nhỏ gọn
- Chọn thông tin muốn xem dùng ảnh
- Xác nhận/Cảnh báo giống nhau
Bạn có thể xem thêm nhiều JavaScript khác về Hình ảnh


Tin tức RSS bằng AJAX

Đoạn code kết hợp JavaScript, RSS và AJAX để nạp các nội dung tin tức trên trang web từ các nguồn khác.... chi tiết tại JavaScriptBank.com - 2.000+ free JavaScript codes


Cách cài đặt

Bước 1: Copy mã JavaScript bên dưới và dán vào khu vực HEAD trên trang web của bạn
JavaScript
Mã:
<script type="text/javascript" src="rssticker.js"></script>

Bước 2: Đặt mã HTML bên dưới vào phần BODY
HTML
Mã:
CNN:
<DIV style="HEIGHT: 100px; border-style: dotted; border-width: 1px; background-color: silver; text-align: left;">
<script type="text/javascript">
//rss_ticker(RSS_id, cachetime, divId, divClass, delay, optionalswitch)
new rss_ticker("CNN", 60, "cnnbox", "cnnclass", 200)

</script>
</DIV>
<br><br><br>
Each ticker on the page can be invoked independently, for example:
<DIV style="HEIGHT: 100px; border-style: dotted; border-width: 1px; background-color: silver; text-align: left;">
<PRE><script type="text/javascript">
//rss_ticker(RSS_id, cachetime, divId, divClass, delay, optionalswitch)
new rss_ticker("CNN", 60, "cnnbox", "cnnclass", 2000)
</script></PRE>

</DIV>

Bước 3: Tải các file bên dưới về
Files
rssticker.js


Hiệu ứng cùng chức năng
- Tin tức cuộn[ngang]
- Đọc tin tức dạng RSS
- Đọc tin tức dạng OPML


Một vài nhãn tương tự: tin tức, RSS, AJAX, nguồn, nạp
Bạn có thể xem thêm nhiều JavaScript khác về Ajax


Soi website

Hiệu ứng cho ta cảm giác như đang xem website qua một vòng tròn trắng.... chi tiết tại JavaScriptBank.com - 2.000+ free JavaScript codes


Cách cài đặt

Bước 1: Copy mã CSS bên dưới và dán vào khu vực HEAD trên trang web của bạn
CSS
Mã:
<style type="text/css">
<!--
body{
background-image : url('none') !important; 
}

#content{
background-color : #ffffff;
position : absolute;
top : 0px;
left : 0px;
padding : 10px;
visibility : hidden;
}

#light{
position : absolute;
top : 0px;
left : 0px;
overflow : hidden;
}
//-->
</style>
	<!--
    	This script downloaded from www.JavaScriptBank.com
    	Come to view and download over 2000+ free javascript at www.JavaScriptBank.com
	-->

Bước 2: Đặt mã HTML bên dưới vào phần BODY
HTML
Mã:
<script type="text/javascript" src="spotlight_part_1.js"></script>
<script type="text/javascript" src="spotlight_part_2.js"></script>
<div style="z-index: 110;"></div>
	<!--
    	This script downloaded from www.JavaScriptBank.com
    	Come to view and download over 2000+ free javascript at www.JavaScriptBank.com
	-->

Bước 3: tải các file
Files
spotlight_part_1.js
spotlight_part_2.js

spotlight.gif


Hiệu ứng cùng chức năng
- Khung gõ địa chỉ website
- Template của cũ website Nirvana
- Thêm và xóa trên website
Bạn có thể xem thêm nhiều JavaScript khác về Màu nền


Chuột có ngôi sao bay quanh

Hiệu ứng tạo ra các đốm vàng bay quanh con trỏ chuột sau đó hội tụ tại một điểm. Một hiệu ứng JavaScript rất đẹp và hữu ích ... chi tiết tại JavaScriptBank.com - 2.000+ free JavaScript codes


Cách cài đặt

Bước 1: Dùng mã JavaScript để cài đặt hiệu ứng
JavaScript
Mã:
<script language="JavaScript">
<!--
/*
Dancing Stars cursor (Submitted by Kurt at kurt.grigg@virgin.net)
Modified and permission granted to Dynamic Drive to feature script in archive
For full source, usage terms, and 100's more DHTML scripts, visit http://dynamicdrive.com
*/

if (document.all){
document.write('<div id="starsDiv" style="position:absolute;top:0px;left:0px">')
for (xy=0;xy<7;xy++)
document.write('<div style="position:relative;width:3px;height:3px;background:#FFFF00;font-size:2px;visibility:visible"></div>')
document.write('</div>')
}

if (document.layers)
{window.captureEvents(Event.MOUSEMOVE);}
var yBase = 200;
var xBase = 200;
var yAmpl = 10;
var yMax = 40;
var step = .2;
var ystep = .5;
var currStep = 0;
var tAmpl=1;
var Xpos = 1;
var Ypos = 1;
var i = 0;
var j = 0;

if (document.all)
{
  function MoveHandler(){
  Xpos = document.body.scrollLeft+event.x;
  Ypos = document.body.scrollTop+event.y;
  }
  document.onmousemove = MoveHandler; 
}

else if (document.layers)
{
  function xMoveHandler(evnt){
  Xpos = evnt.pageX;
  Ypos = evnt.pageY;
  }
  window.onMouseMove = xMoveHandler;
}


function animateLogo() {
if (document.all)
{
 yBase = window.document.body.offsetHeight/4;
 xBase = window.document.body.offsetWidth/4;
}
else if (document.layers)
{
 yBase = window.innerHeight/4 ;
 xBase = window.innerWidth/4;
}

if (document.all)
{
var totaldivs=document.all.starsDiv.all.length
 for ( i = 0 ; i < totaldivs ; i++ )
 {
var tempdiv=document.all.starsDiv.all[i].style
  tempdiv.top = Ypos + Math.cos((20*Math.sin(currStep/20))+i*70)*yBase*(Math.sin(10+currStep/10)+0.2)*Math.cos((currStep + i*25)/10);
  tempdiv.left = Xpos + Math.sin((20*Math.sin(currStep/20))+i*70)*xBase*(Math.sin(10+currStep/10)+0.2)*Math.cos((currStep + i*25)/10);
 }
}

else if (document.layers)
{
 for ( j = 0 ; j < 7 ; j++ ) 
 {
var templayer="a"+j
  document.layers[templayer].top = Ypos + Math.cos((20*Math.sin(currStep/20))+j*70)*yBase*(Math.sin(10+currStep/10)+0.2)*Math.cos((currStep + j*25)/10);
  document.layers[templayer].left =Xpos + Math.sin((20*Math.sin(currStep/20))+j*70)*xBase*(Math.sin(10+currStep/10)+0.2)*Math.cos((currStep + j*25)/10);
 }
}
currStep += step;
setTimeout("animateLogo()", 15);
}
animateLogo();
// -->
</script>

Bước 2: Đặt mã HTML bên dưới vào phần BODY
HTML
Mã:
<LAYER NAME="a0" LEFT=10 TOP=10 VISIBILITY=SHOW BGCOLOR="#FFFF00" CLIP="0,0,3,3"></LAYER>
<LAYER NAME="a1" LEFT=10 TOP=10 VISIBILITY=SHOW BGCOLOR="#FFFF00" CLIP="0,0,3,3"></LAYER>
<LAYER NAME="a2" LEFT=10 TOP=10 VISIBILITY=SHOW BGCOLOR="#FFFF00" CLIP="0,0,3,3"></LAYER>
<LAYER NAME="a3" LEFT=10 TOP=10 VISIBILITY=SHOW BGCOLOR="#FFFF00" CLIP="0,0,3,3"></LAYER>
<LAYER NAME="a4" LEFT=10 TOP=10 VISIBILITY=SHOW BGCOLOR="#FFFF00" CLIP="0,0,3,3"></LAYER>
<LAYER NAME="a5" LEFT=10 TOP=10 VISIBILITY=SHOW BGCOLOR="#FFFF00" CLIP="0,0,3,3"></LAYER>
<LAYER NAME="a6" LEFT=10 TOP=10 VISIBILITY=SHOW BGCOLOR="#FFFF00" CLIP="0,0,3,3"></LAYER>


Bạn có thể xem các mã tương tự bên dưới
- Hệ thống đánh giá bằng ngôi sao
- Ngôi sao nổ
- Các ngôi sao bay


Một vài nhãn tương tự: ngôi sao, bay quanh, đốm vàng, con trỏ chuột, hội tụ, hữu ích, trang trí, hiệu ứng
Bạn có thể xem thêm nhiều JavaScript khác về Con trỏDi chuyển theo chuột


Thời gian một số thành phố

Hiệu ứng hiển thị giờ của một số thành phố lớn trên thế giới so với giờ hiện tại trên máy tính. Thời gian này được hiển thị trong các thẻ input.... chi tiết tại JavaScriptBank.com - 2.000+ free JavaScript codes


Cách cài đặt

Bước 1: Dùng mã JavaScript để cài đặt hiệu ứng
JavaScript
Mã:
<SCRIPT LANGUAGE="JavaScript">
<!-- Original:  Emanuel Gavrilv (eltal@sprint.ca) -->

<!-- Begin
function GetTime() { 
var dt = new Date();
var def = dt.getTimezoneOffset()/60;
var gmt = (dt.getHours() + def);
document.clock.local.value = (IfZero(dt.getHours()) + ":" + IfZero(dt.getMinutes()) + ":" + IfZero(dt.getSeconds()));
var ending = ":" + IfZero(dt.getMinutes()) + ":" +  IfZero(dt.getSeconds());
var rome =check24(((gmt + 1) > 24) ? ((gmt + 1) - 24) : (gmt + 1));
document.clock.rome.value = (IfZero(rome) + ending);
var isr =check24(((gmt + 2) > 24) ? ((gmt + 2) - 24) : (gmt + 2));
document.clock.Israel.value = (IfZero(isr) + ending);
var msw =check24(((gmt + 3) > 24) ? ((gmt + 3) - 24) : (gmt + 3));
document.clock.msw.value = (IfZero(msw) + ending);
var baku =check24(((gmt + 4) > 24) ? ((gmt + 4) - 24) : (gmt + 4));
document.clock.baku.value = (IfZero(baku) + ending);
var del =check24(((gmt + 5) > 24) ? ((gmt + 5) - 24) : (gmt + 5));
document.clock.del.value = (IfZero(del) + ending);
var dh =check24(((gmt + 6) > 24) ? ((gmt + 6) - 24) : (gmt + 6));
document.clock.dh.value = (IfZero(dh) + ending);
var kok =check24(((gmt +7 ) > 24) ? ((gmt +7 ) - 24) : (gmt + 7));
document.clock.kok.value = (IfZero(kok) + ending);
var ho =check24(((gmt + 8) > 24) ? ((gmt + 8) - 24) : (gmt + 8));
document.clock.ho.value = (IfZero(ho) + ending);
var tky =check24(((gmt + 9) > 24) ? ((gmt + 9) - 24) : (gmt + 9));
document.clock.tky.value = (IfZero(tky) + ending);
var sdn =check24(((gmt + 10) > 24) ? ((gmt + 10) - 24) : (gmt + 10));
document.clock.sdn.value = (IfZero(sdn) + ending);
var mag =check24(((gmt + 11) > 24) ? ((gmt + 11) - 24) : (gmt + 11));
document.clock.mag.value = (IfZero(mag) + ending);
var wll =check24(((gmt + 12) > 24) ? ((gmt + 12) - 24) : (gmt + 12));
document.clock.wll.value = (IfZero(wll) + ending);

var _GMT =check24(((gmt) > 24) ? ((gmt) - 24) : (gmt));

document.clock._GMT.value = (IfZero(_GMT) + ":" + IfZero(dt.getMinutes()) + ":" + IfZero(dt.getSeconds()));
var eniw =check24(((gmt + (24-12)) > 24) ? ((gmt + (24-12)) - 24) : (gmt + (24-12)));
document.clock.eniw.value = (IfZero(eniw) + ending);
var sam =check24(((gmt + (24-11)) > 24) ? ((gmt + (24-11)) - 24) : (gmt + (24-11)));
document.clock.sam.value = (IfZero(sam) + ending);
var haw =check24(((gmt + (24-10)) > 24) ? ((gmt + (24-10)) - 24) : (gmt + (24-10)));
document.clock.Hawaii.value = (IfZero(haw) + ending);
var ala =check24(((gmt + (24-9)) > 24) ? ((gmt + (24-9)) - 24) : (gmt + (24-9)));
document.clock.alaska.value = (IfZero(ala) + ending);
var pacif =check24(((gmt + (24-8)) >= 24) ? ((gmt + (24-8)) - 24) : (gmt + (24-8)));
document.clock.pacif.value = (IfZero(pacif) + ending);
var mount =check24(((gmt + (24-7)) > 24) ? ((gmt + (24-7)) - 24) : (gmt + (24-7)));
document.clock.mount.value = (IfZero(mount) + ending);
var center =check24(((gmt + (24-6)) > 24) ? ((gmt + (24-6)) - 24) : (gmt + (24-6)));
document.clock.center.value = (IfZero(center) + ending);
var east =check24(((gmt + (24-5)) > 24) ? ((gmt + (24-5)) - 24) : (gmt + (24-5)));
document.clock.east.value = (IfZero(east) + ending);
var atl =check24(((gmt + (24-4)) > 24) ? ((gmt + (24-4)) - 24) : (gmt + (24-4)));
document.clock.atl.value = (IfZero(atl) + ending);
var bra =check24(((gmt + (24-3)) > 24) ? ((gmt + (24-3)) - 24) : (gmt + (24-3)));
bra = (bra >= 24) ? bra - 24 : bra;
document.clock.bra.value = (IfZero(bra) + ending);
var mid =check24(((gmt + (24-2)) > 24) ? ((gmt + (24-2)) - 24) : (gmt + (24-2)));
mid = (mid >= 24) ? mid - 24 : mid;
document.clock.mid.value = (IfZero(mid) + ending);
var azo =check24(((gmt + (24-1)) > 24) ? ((gmt + (24-1)) - 24) : (gmt + (24-1)));
azo = (azo >= 24) ? azo - 24 : azo;
document.clock.azo.value = (IfZero(azo) + ending);
setTimeout("GetTime()", 1000);
}
function IfZero(num) {
return ((num <= 9) ? ("0" + num) : num);
}
function check24(hour) {
return (hour >= 24) ? hour - 24 : hour;
}
//  End -->
</script>
	<!--
    	This script downloaded from www.JavaScriptBank.com
    	Come to view and download over 2000+ free javascript at www.JavaScriptBank.com
	-->

Bước 2: Đặt mã HTML bên dưới vào phần BODY
HTML
Mã:
<BODY onLoad="javascript:GetTime();">
<form name="clock">
<strong>Local Time <input type="text" size="8" name="local"></strong>
<p>
Eniwetok (GMT-12)  <input type="text" size="8" name="eniw"><br>
Samoa (GMT-11)  <input type="text" size="8" name="sam"><br>
Hawaii (GMT-10)  <input type="text" size="8" name="Hawaii">
<p>
Alaska (GMT-9)  <input type="text" size="8" name="alaska"><br>
Pacific Time (GMT-8)  <input type="text" size="8" name="pacif"><br>
Mountain Time (GMT-7)  <input type="text" size="8" name="mount">

<p>
Central Time (GMT-6)  <input type="text" size="8" name="center"><br>
Eastern Time (GMT-5)  <input type="text" size="8" name="east"><br>
Atlantic Time (GMT-4)  <input type="text" size="8" name="atl">
<p>
Brazilia (GMT-3)  <input type="text" size="8" name="bra"><br>
Mid-Atlantic (GMT-2)  <input type="text" size="8" name="mid"><br>
Azores (GMT-1)  <input type="text" size="8" name="azo">
<p>
<strong>Greenwich Mean Time (GMT)  <input type="text" size="8" name="_GMT"></strong>

<p>
Rome (GMT +1)  <input type="text" size="8" name="rome"><br>
Israel (GMT +2)  <input type="text" size="8" name="Israel"><br>
Moscow (GMT +3)  <input type="text" size="8" name="msw">
<p>
Baku (GMT +4)  <input type="text" size="8" name="baku"><br>
New Delhi (GMT +5)  <input type="text" size="8" name="del"><br>
Dhakar (GMT +6)  <input type="text" size="8" name="dh">
<p>
Bangkok (GMT +7)  <input type="text" size="8" name="kok"><br>

Hong Kong (GMT +8)  <input type="text" size="8" name="ho"><br>
Tokyo (GMT +9)  <input type="text" size="8" name="tky">
<p>
Sydney (GMT +10)  <input type="text" size="8" name="sdn"><br>
Magadan (GMT +11)  <input type="text" size="8" name="mag"><br>
Wellington (GMT +12)  <input type="text" size="8" name="wll">
</form>
</body>
	<!--
    	This script downloaded from www.JavaScriptBank.com
    	Come to view and download over 2000+ free javascript at www.JavaScriptBank.com
	-->


Các hiệu ứng tương tự
- Thời gian các nơi (so với Nhật)
- Chuyển trang với khoảng thời gian
- Thời gian ở trên trang web
Bạn có thể xem thêm nhiều JavaScript khác về Thời gianĐồng hồ


Cửa sổ popup tự động trượt

Đoạn mã JavaScript này sẽ tạo một cửa sổ popup ngay bên trong trang web bằng cách sử dụng mộ... chi tiết tại JavaScriptBank.com - 2.000+ free JavaScript codes


Cách cài đặt

Bước 1: Đặt mã CSS bên dưới vào phần HEAD
CSS
Mã:
<style type="text/css">
/*
     This script downloaded from www.JavaScriptBank.com
     Come to view and download over 2000+ free javascript at www.JavaScriptBank.com
*/
.jsbank_sample_cont {margin: 20px; padding: 20px;}
.jsbank_sample_tit {font-weight: bold; margin-bottom: 10px; padding: 5px; width: auto; background-color: #c0c0c0; border: 5px solid #a0a0a0; color: black; text-align: center;}
/*
Created by: Jeroen Haan 
Web Site: http://www.haan.net/ 

*/
#layer1 {
	position: absolute;
	visibility: hidden;
	width: 400px;
	height: 300px;
	left: 20px;
	top: 300px;
	background-color: #ccc;
	border: 1px solid #000;
	padding: 10px;
}

#close {
	float: right;
}
</style>

Bước 2: Dùng mã JavaScript để cài đặt hiệu ứng
JavaScript
Mã:
<SCRIPT type=text/javascript>
<!--
// Created by: Jeroen Haan :: http://www.haan.net/

/* -----------------------------------------------
   Floating layer - v.1
   (c) 2006 www.haan.net
   contact: jeroen@haan.net
   You may use this script but please leave the credits on top intact.
   Please inform us of any improvements made.
   When usefull we will add your credits.
  ------------------------------------------------ */

x = 20;
y = 70;
function setVisible(obj)
{
	obj = document.getElementById(obj);
	obj.style.visibility = (obj.style.visibility == 'visible') ? 'hidden' : 'visible';
}
function placeIt(obj)
{
	obj = document.getElementById(obj);
	if (document.documentElement)
	{
		theLeft = document.documentElement.scrollLeft;
		theTop = document.documentElement.scrollTop;
	}
	else if (document.body)
	{
		theLeft = document.body.scrollLeft;
		theTop = document.body.scrollTop;
	}
	theLeft += x;
	theTop += y;
	obj.style.left = theLeft + 'px' ;
	obj.style.top = theTop + 'px' ;
	setTimeout("placeIt('layer1')",500);
}
window.onscroll = setTimeout("placeIt('layer1')",500);
//-->
</SCRIPT>

Bước 3: Copy mã HTML bên dưới và dán vào khu vực BODY trên trang web của bạn
HTML
Mã:
<DIV id=layer1><SPAN id=close><A style="TEXT-DECORATION: none" 
href="javascript:setVisible('layer1')"><STRONG>Hide</STRONG></A></SPAN> 
<P>Lorem ipsum dolor sit amet, consectetuer adipiscing elit, sed diam nonummy 
nibh euismod tincidunt ut laoreet dolore magna aliquam erat volutpat. Ut wisi 
enim ad minim veniam, quis nostrud exerci.</P><BR><BR><IMG height=65 
src="../image/logojs.gif" width=120 border=0> </DIV>
<p>This link uses the onclick event handler.<br>
<a href="#" onclick="setVisible('layer1');return false" target="_self">Open popup</a></p>

<p>This next one uses the javascript link inside the href tag.<br>
<a href="javascript:setVisible('layer1',true)">Open popup</a></p>

<form>
And this one uses the input button inside a form tag.<br>
  <input type="button" value="Open popup" onclick="setVisible('layer1')">
</form>

<p>It can also be used in an image map. Here, the word 'Webhost' contains the link<br>
<img src="../image/logojs.gif" width="120" height="65" border="0" usemap="#Map">
  <map name="Map" id="Map">
    <area shape="rect" coords="1,1,113,23" href="#" onclick="setVisible('layer1');return false" target="_self">
  </map>


Hiệu ứng cùng chức năng
- Bộ chọn ngày với cửa sổ phụ
- Mở liên kết trong cửa sổ mới
- Mở liên kết trong các cửa sổ mới


Một vài nhãn tương tự: cửa sổ popup, cửa sổ, popup, tự động, trượt, layer, thanh cuộn, trình duyệt
Bạn có thể xem thêm nhiều JavaScript khác về Trình duyệtPopup


Bài viết mới nhất

Back
Top Bottom